If you love crafting then Halloween is a great time to get creative. There are so many ideas out there for easy Halloween crafts that you’re spoiled for choice.
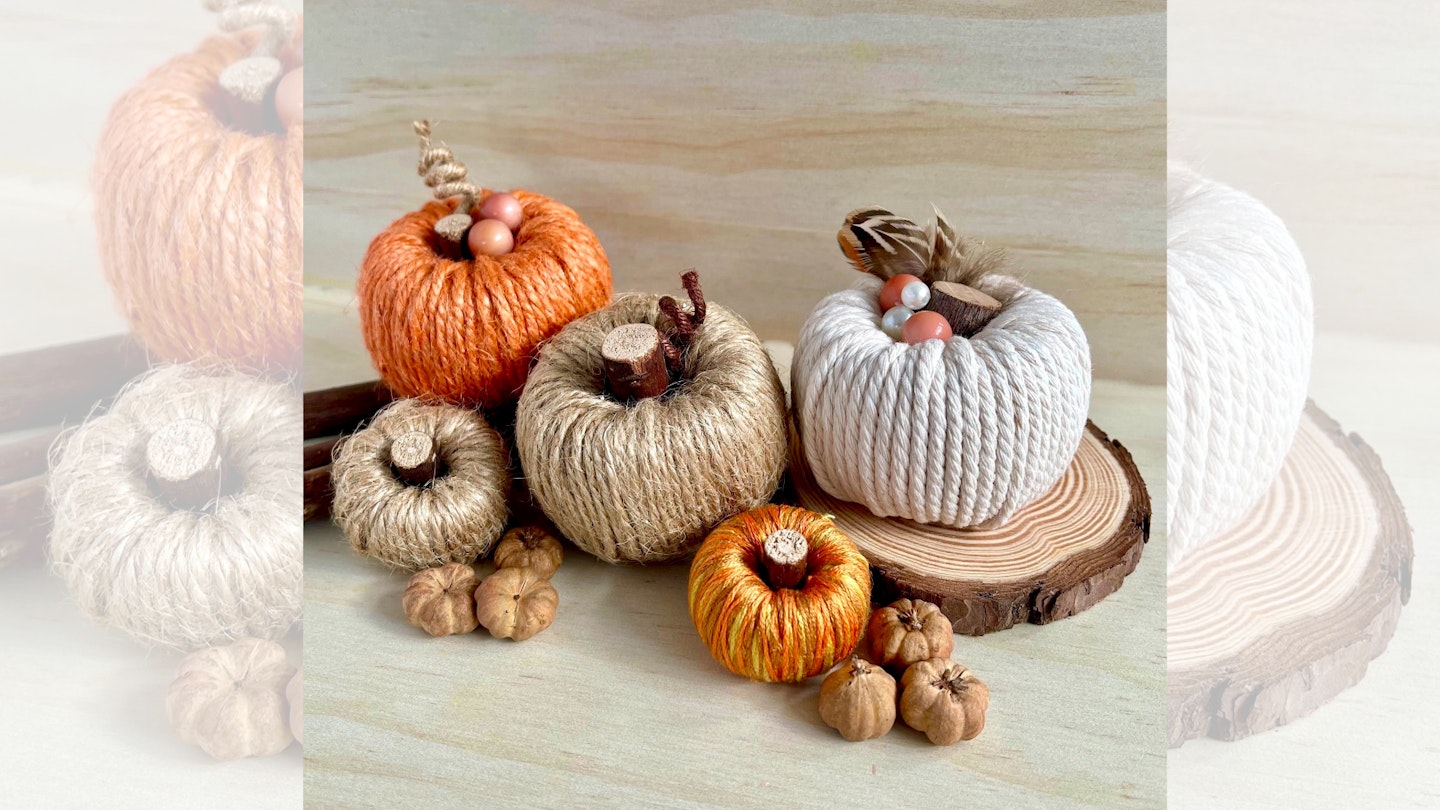
These super-easy craft pumpkins would make a great addition to your Halloween decorations.
They’re perfect if you want to get involved in some DIY Halloween crafts.
Created by maker Katie Sharpe, they also make a brilliant autumnal centrepiece for your table.
They are so easy to make that you’ll soon have a whole collection of them.
Set aside some time and have an arts and crafts Halloween session. Just follow Katie’s simple, step-by-step guide below to make these rustic craft pumpkins…
What you'll need
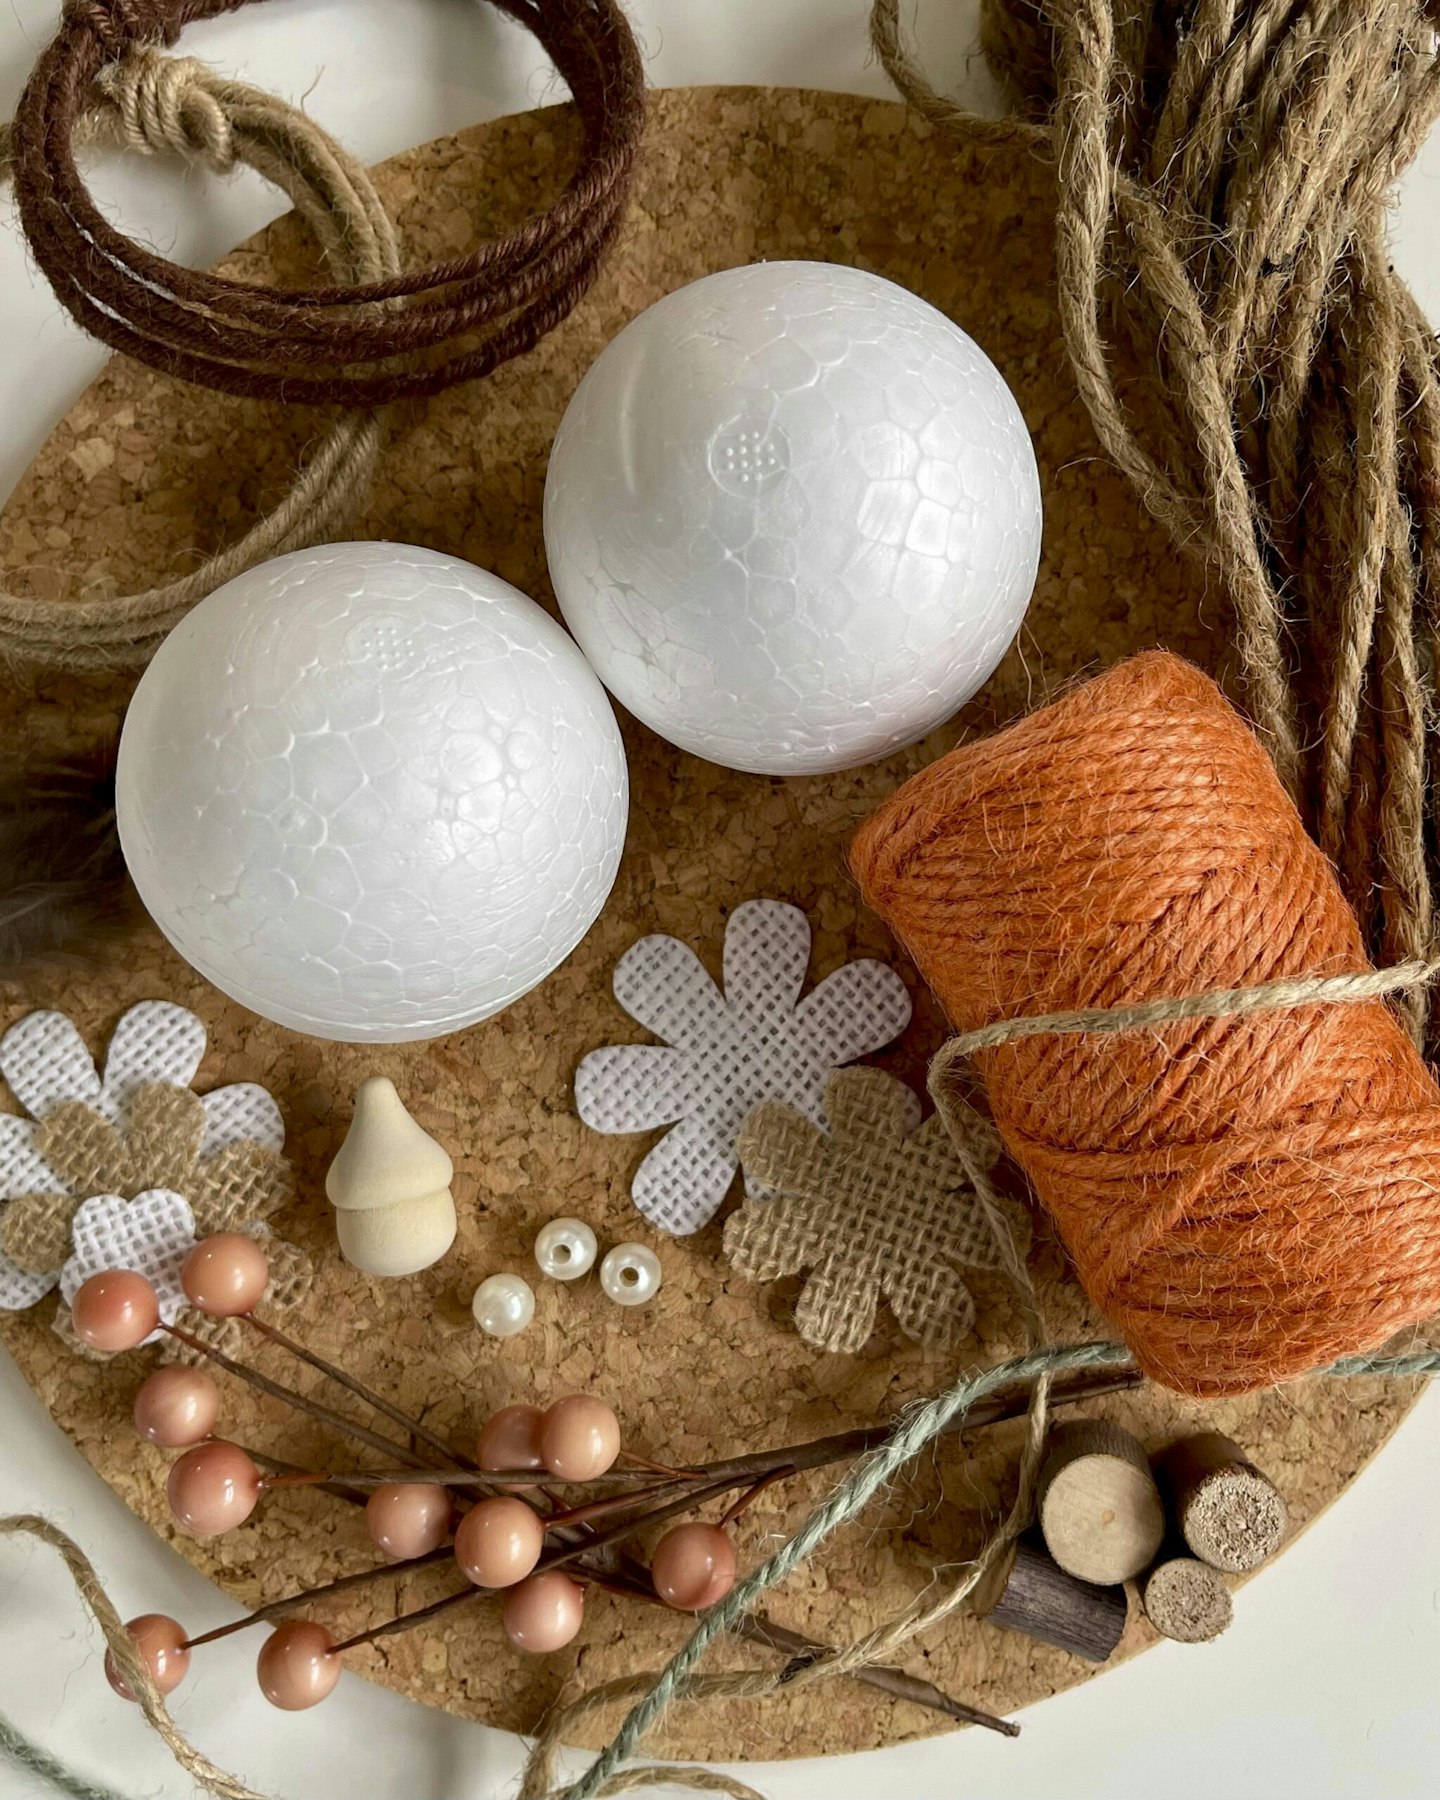
• Polystyrene balls, available in different sizes at craft shops
• Small serrated knife
• Selection of twine, yarn, embroidery thread or cord
• Large-eyed needle - ideally a tapestry or wool needle - for sewing
• PVA glue
• Hot glue gun
• Small pieces of scrap fabric
• Wooden sticks/twigs
• Rustic or autumn-themed embellishments
How to make:
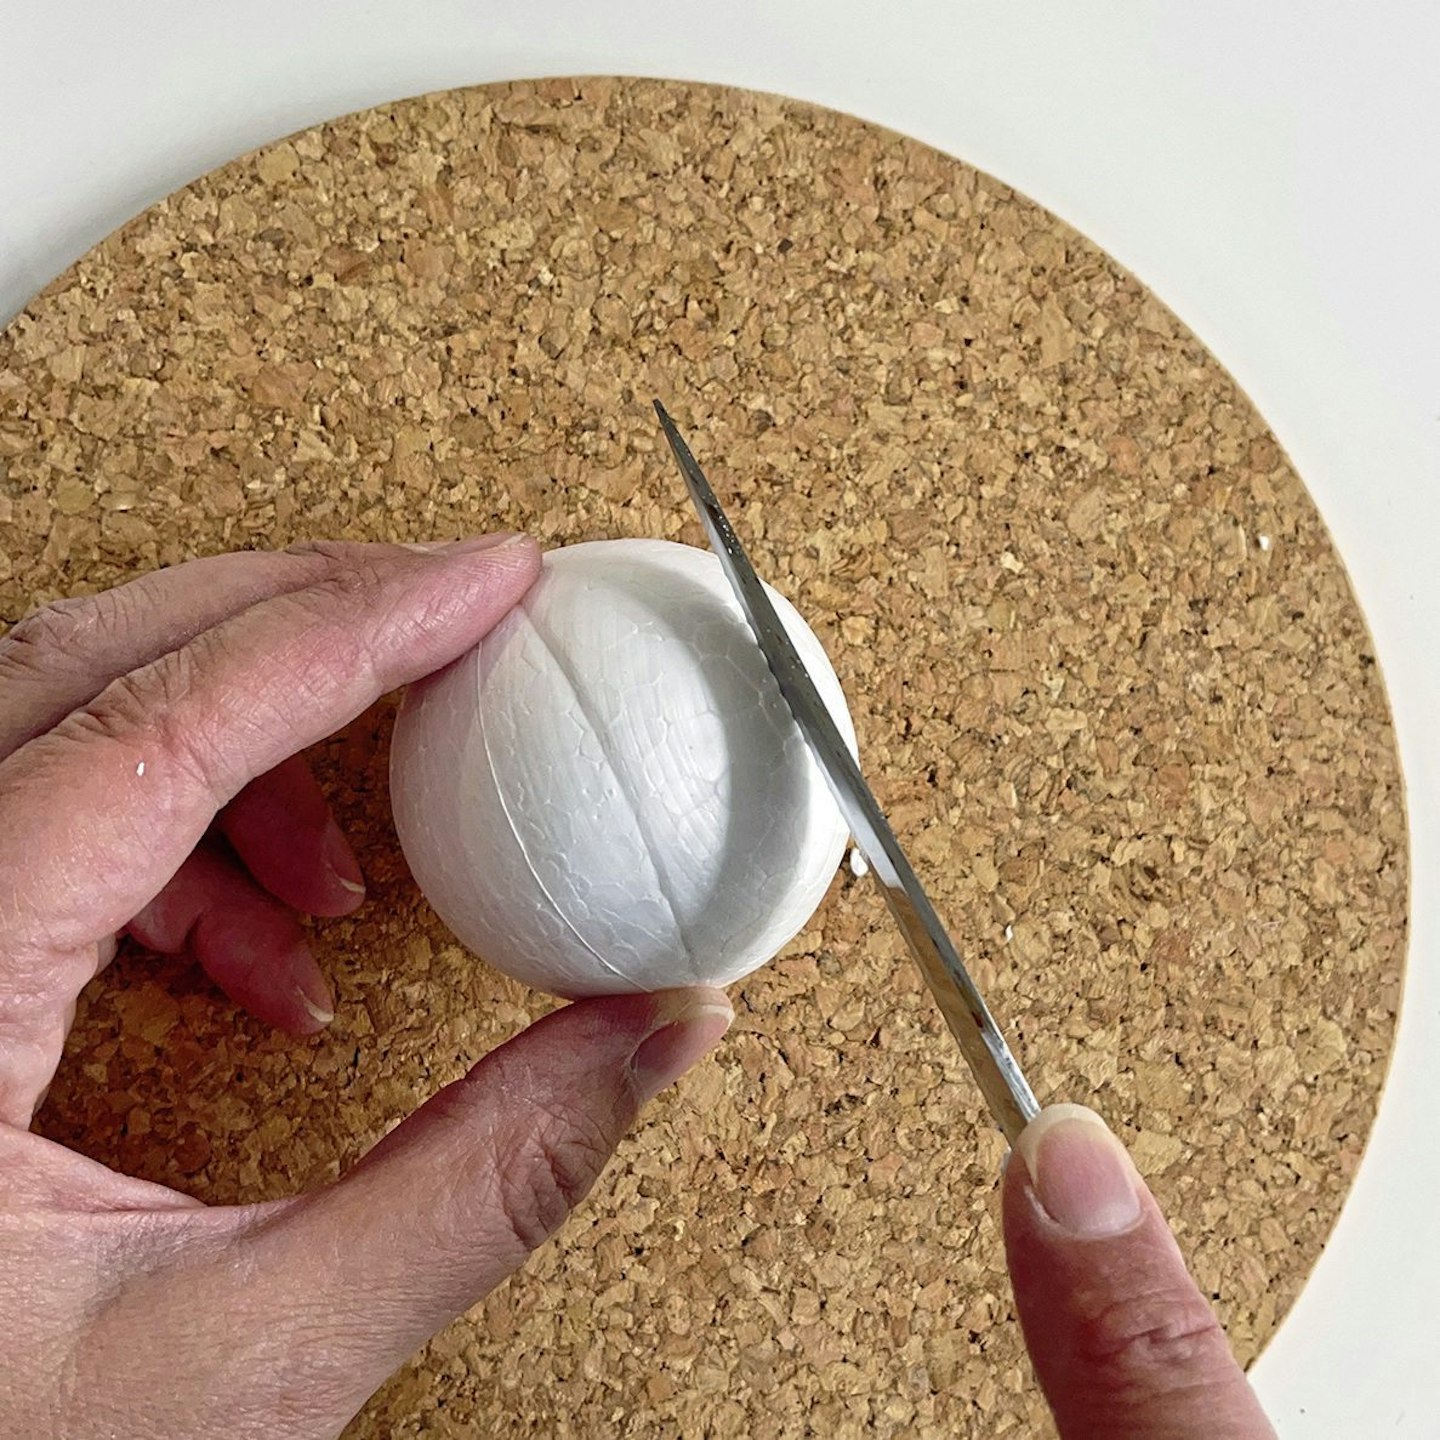
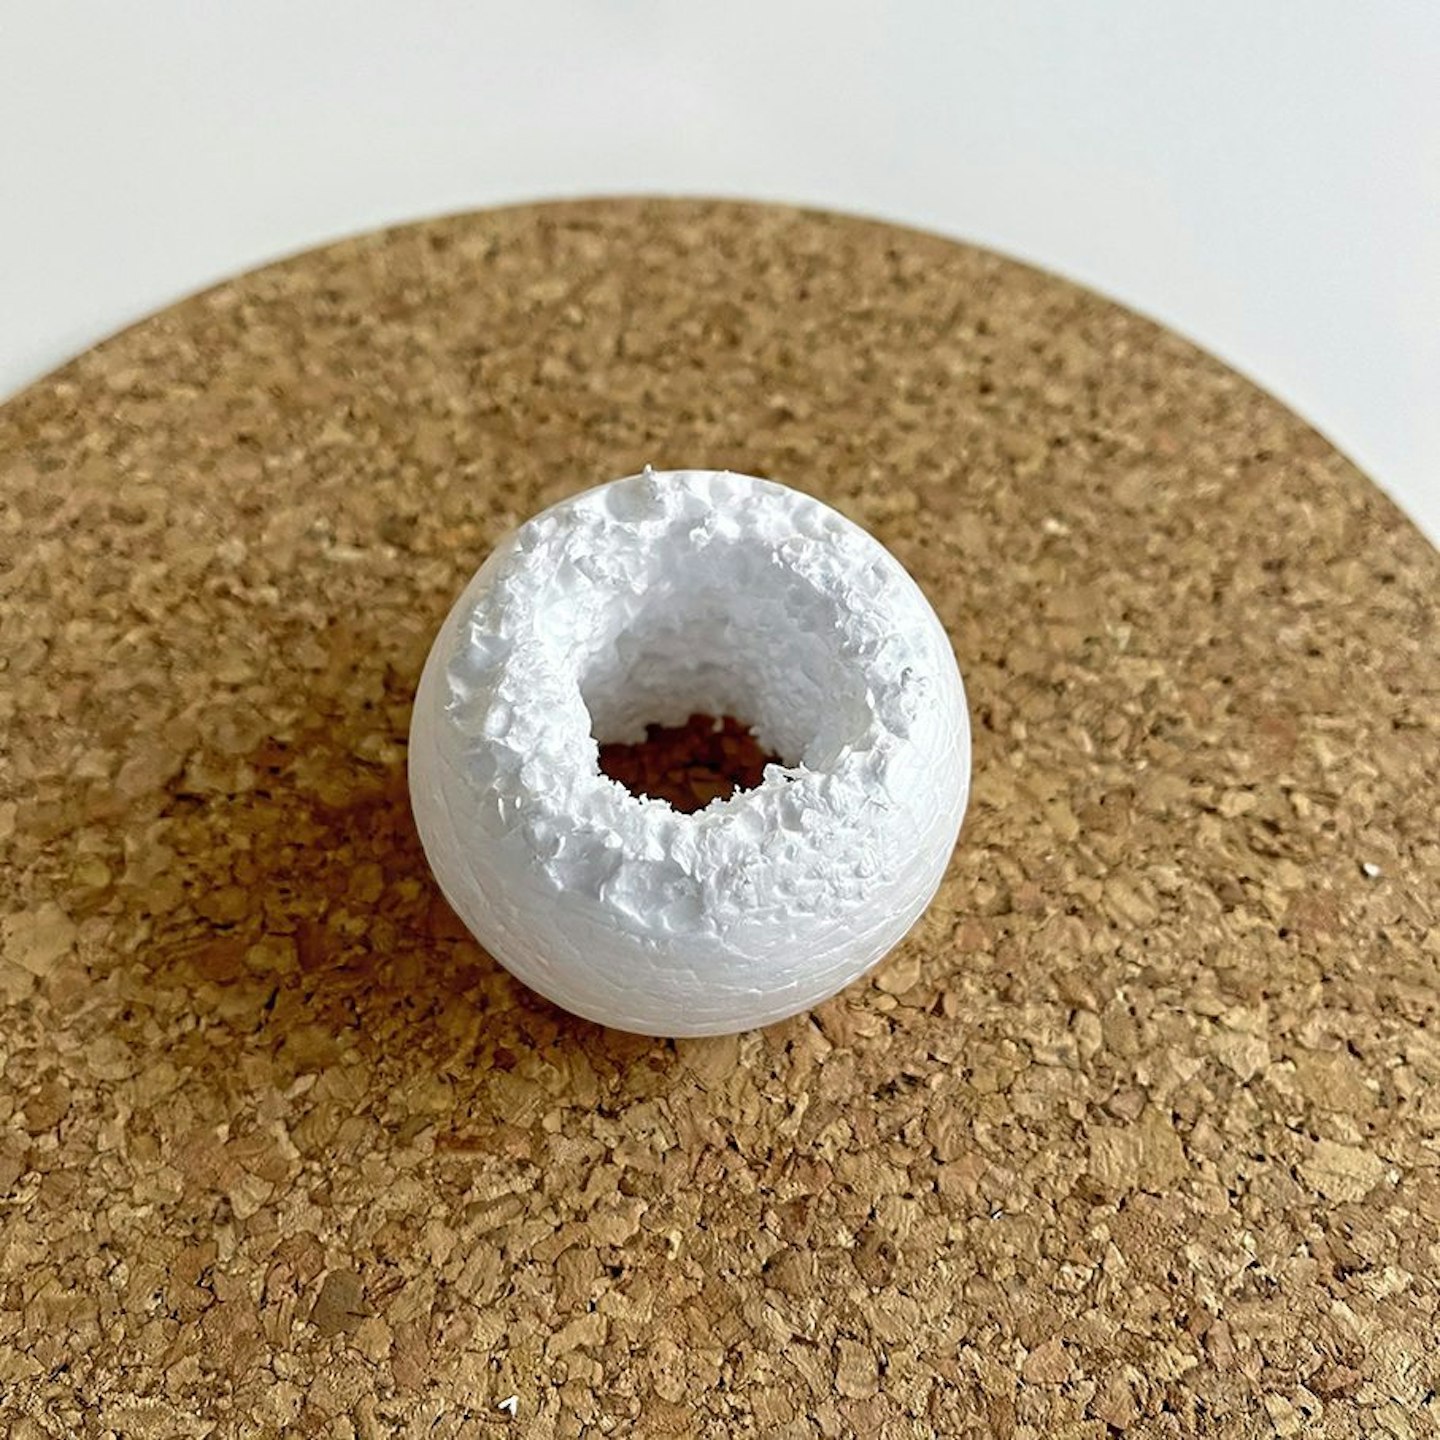
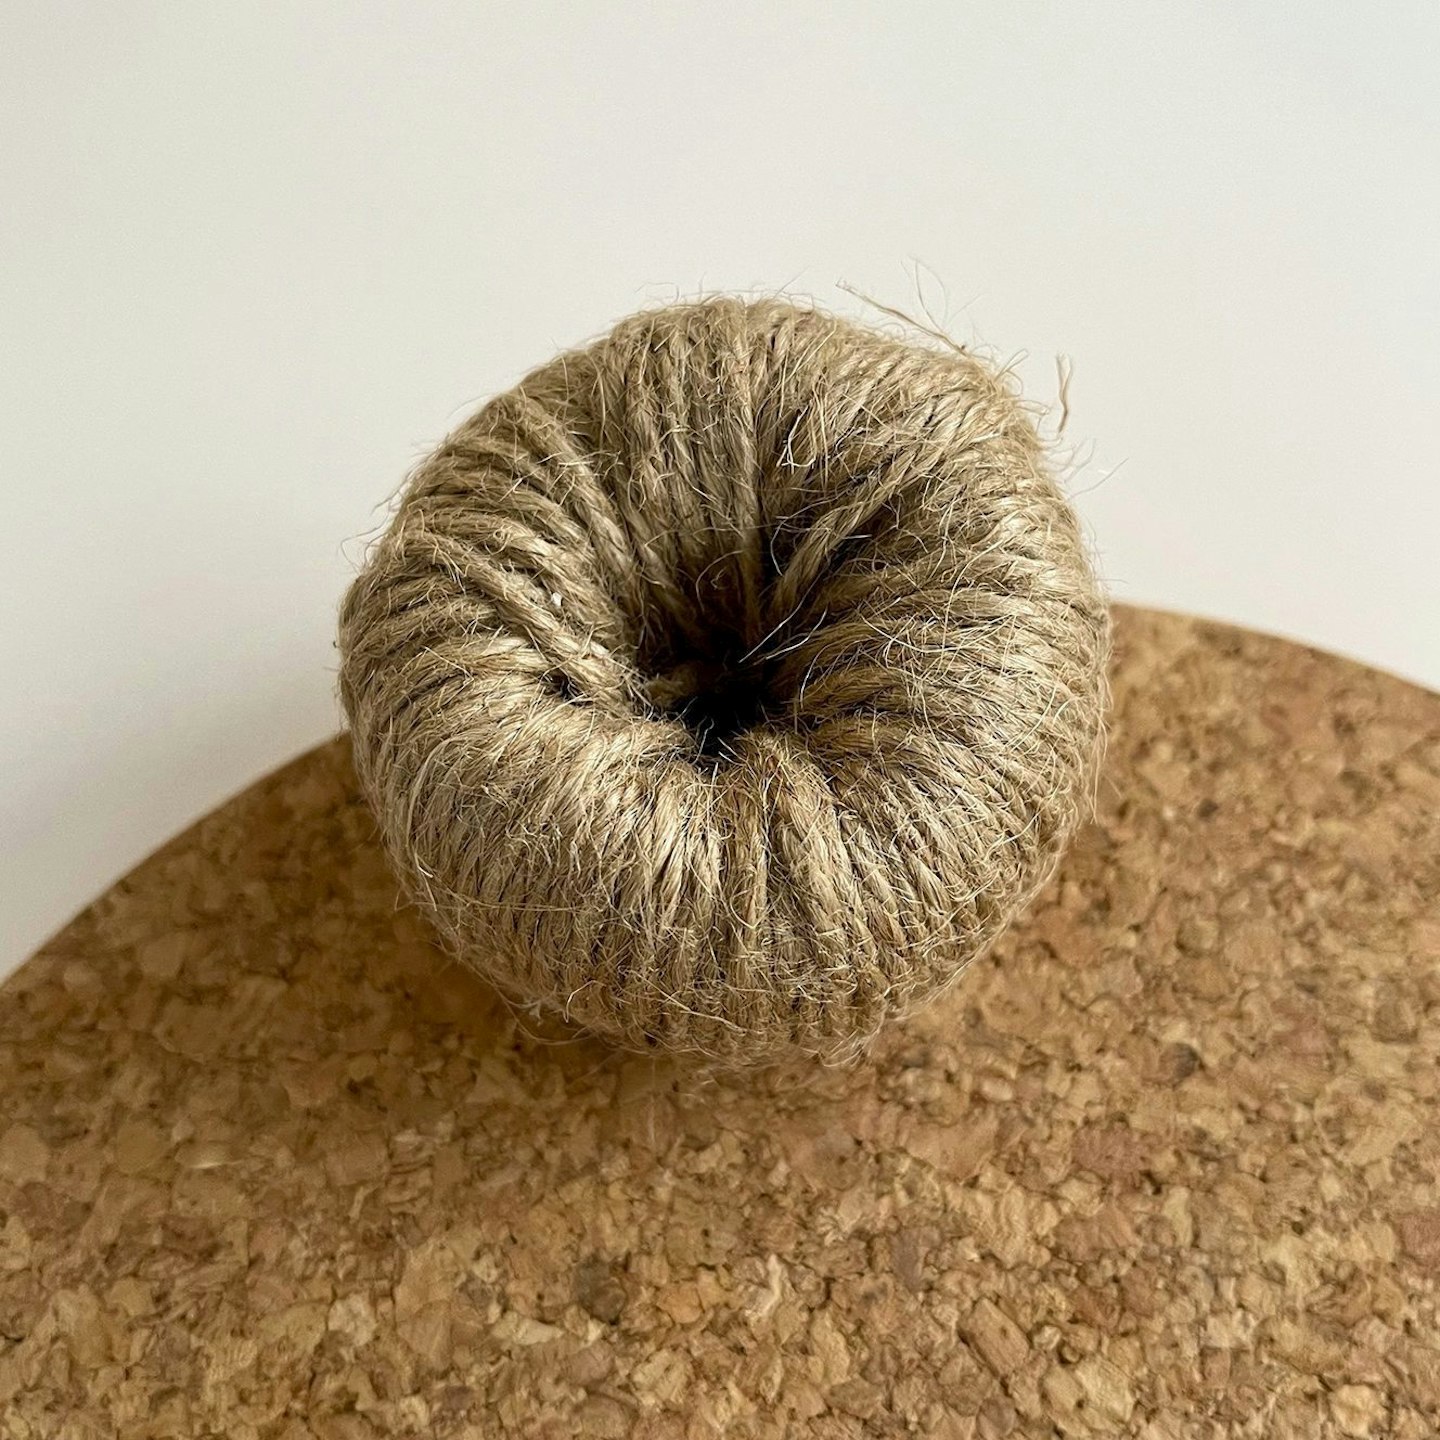
1 Cut off the top and bottom of a polystyrene ball - a serrated knife works best for this. It can get a little messy, so cut on a mat or some paper that you can shake off into the bin. Gently round off the cut edges to sculpt the ball into a pumpkin shape.
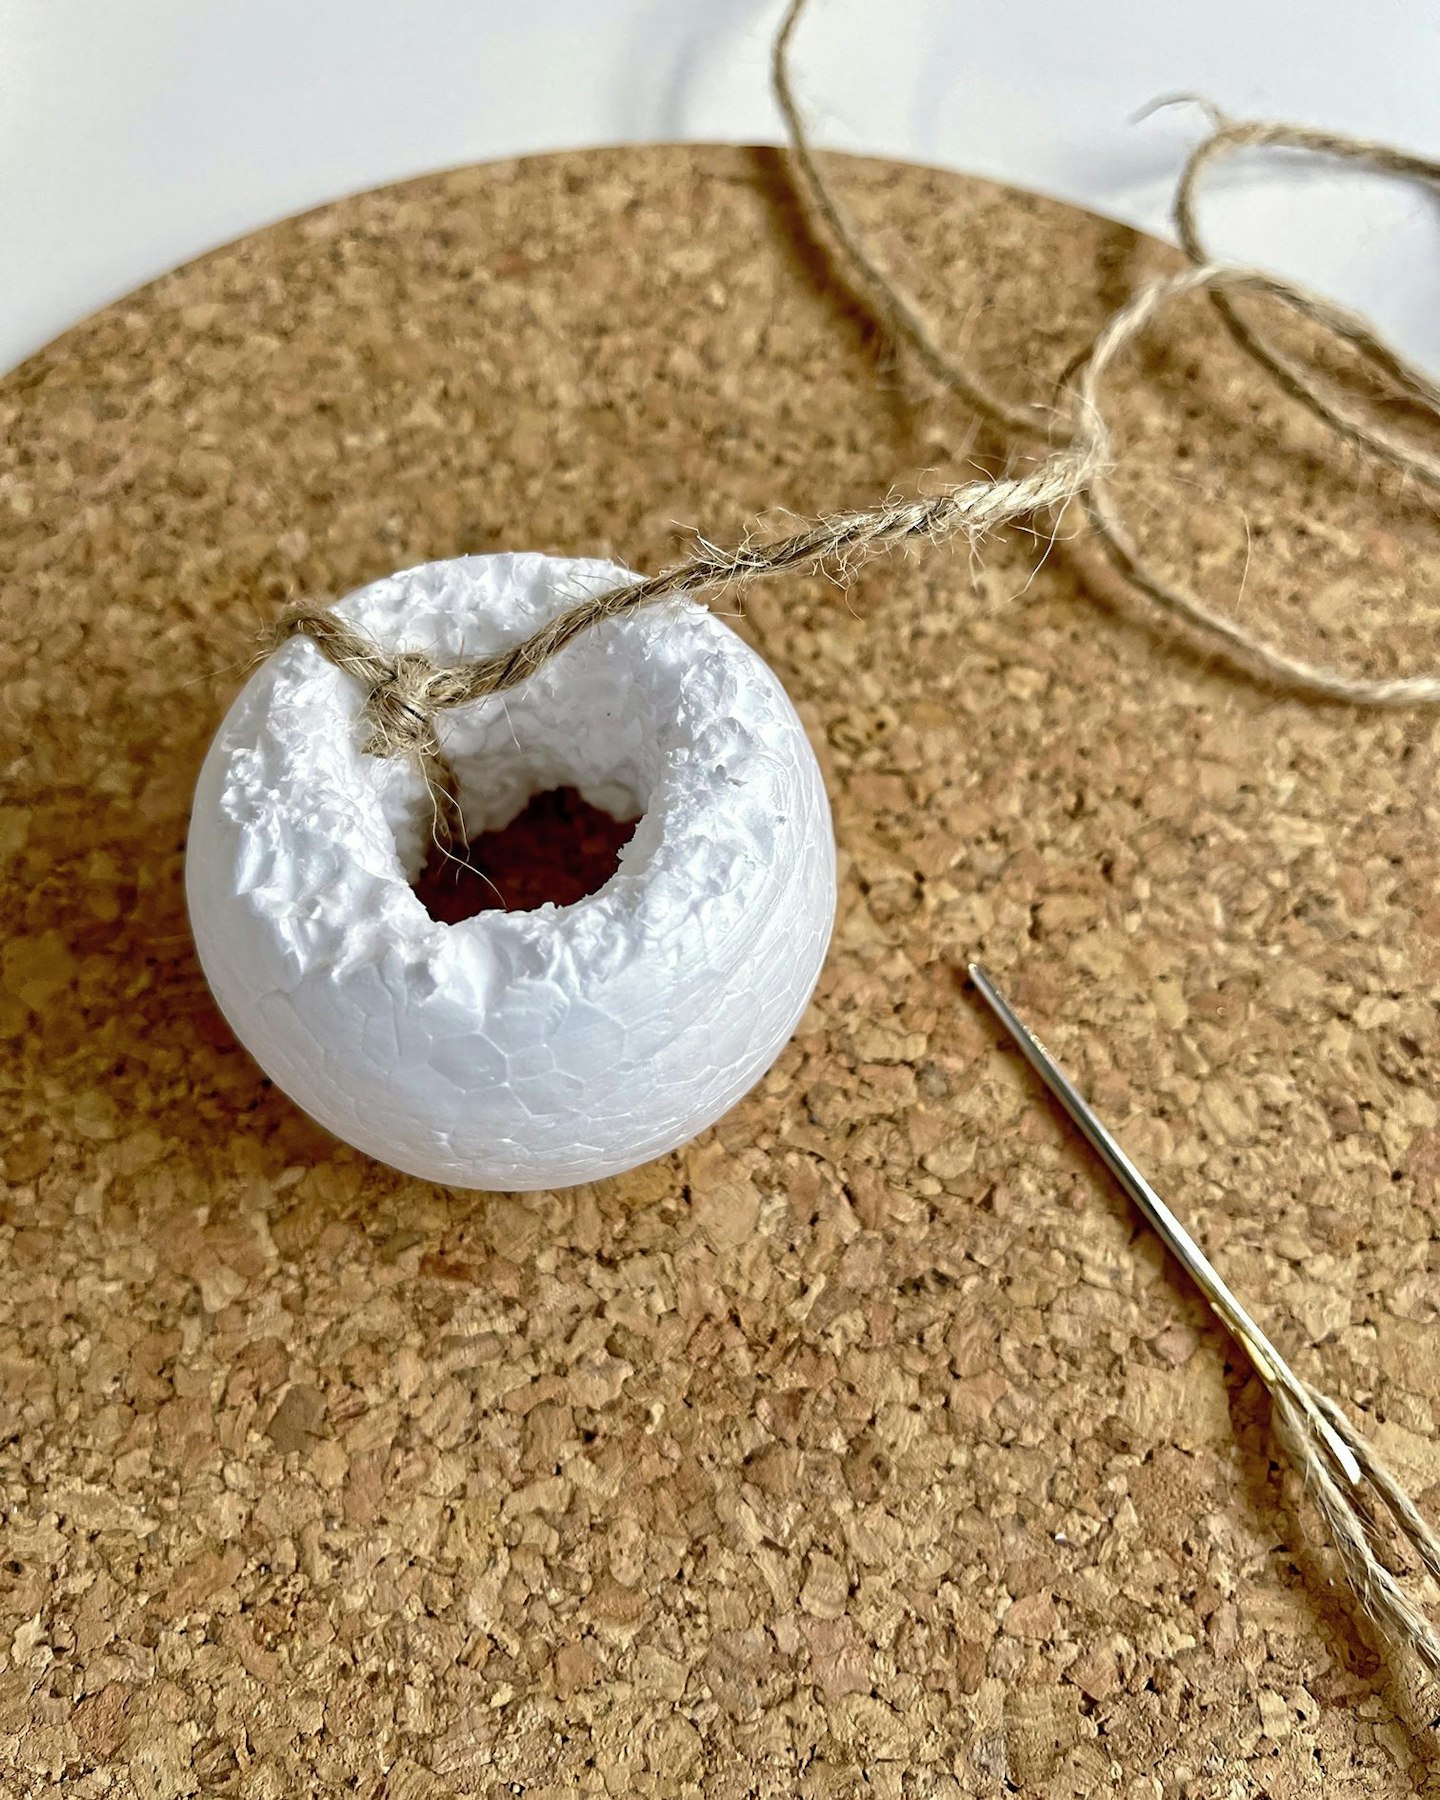
2 Carefully use your knife to make a hole through the centre of the pumpkin from top to bottom, and scrape out the centre to widen the hole, aiming to create a doughnut shape. The hole will need to be quite big to accommodate the twine that will be threaded through. It doesn't need to be perfect, in fact the wonkier the better to make it more pumpkin-like!
3 Tie a length of twine around the pumpkin through the middle and use a wide-eyed needle to thread it through and around until the whole surface is covered.
TOP TIP: If your twine is too thick for your needle, wrap some masking tape around the end to to stiffen it instead.
4 To help adhere the twine in place, spread PVA glue on to the surface as you work your way around, and push the twine together to ensure that there are no gaps.
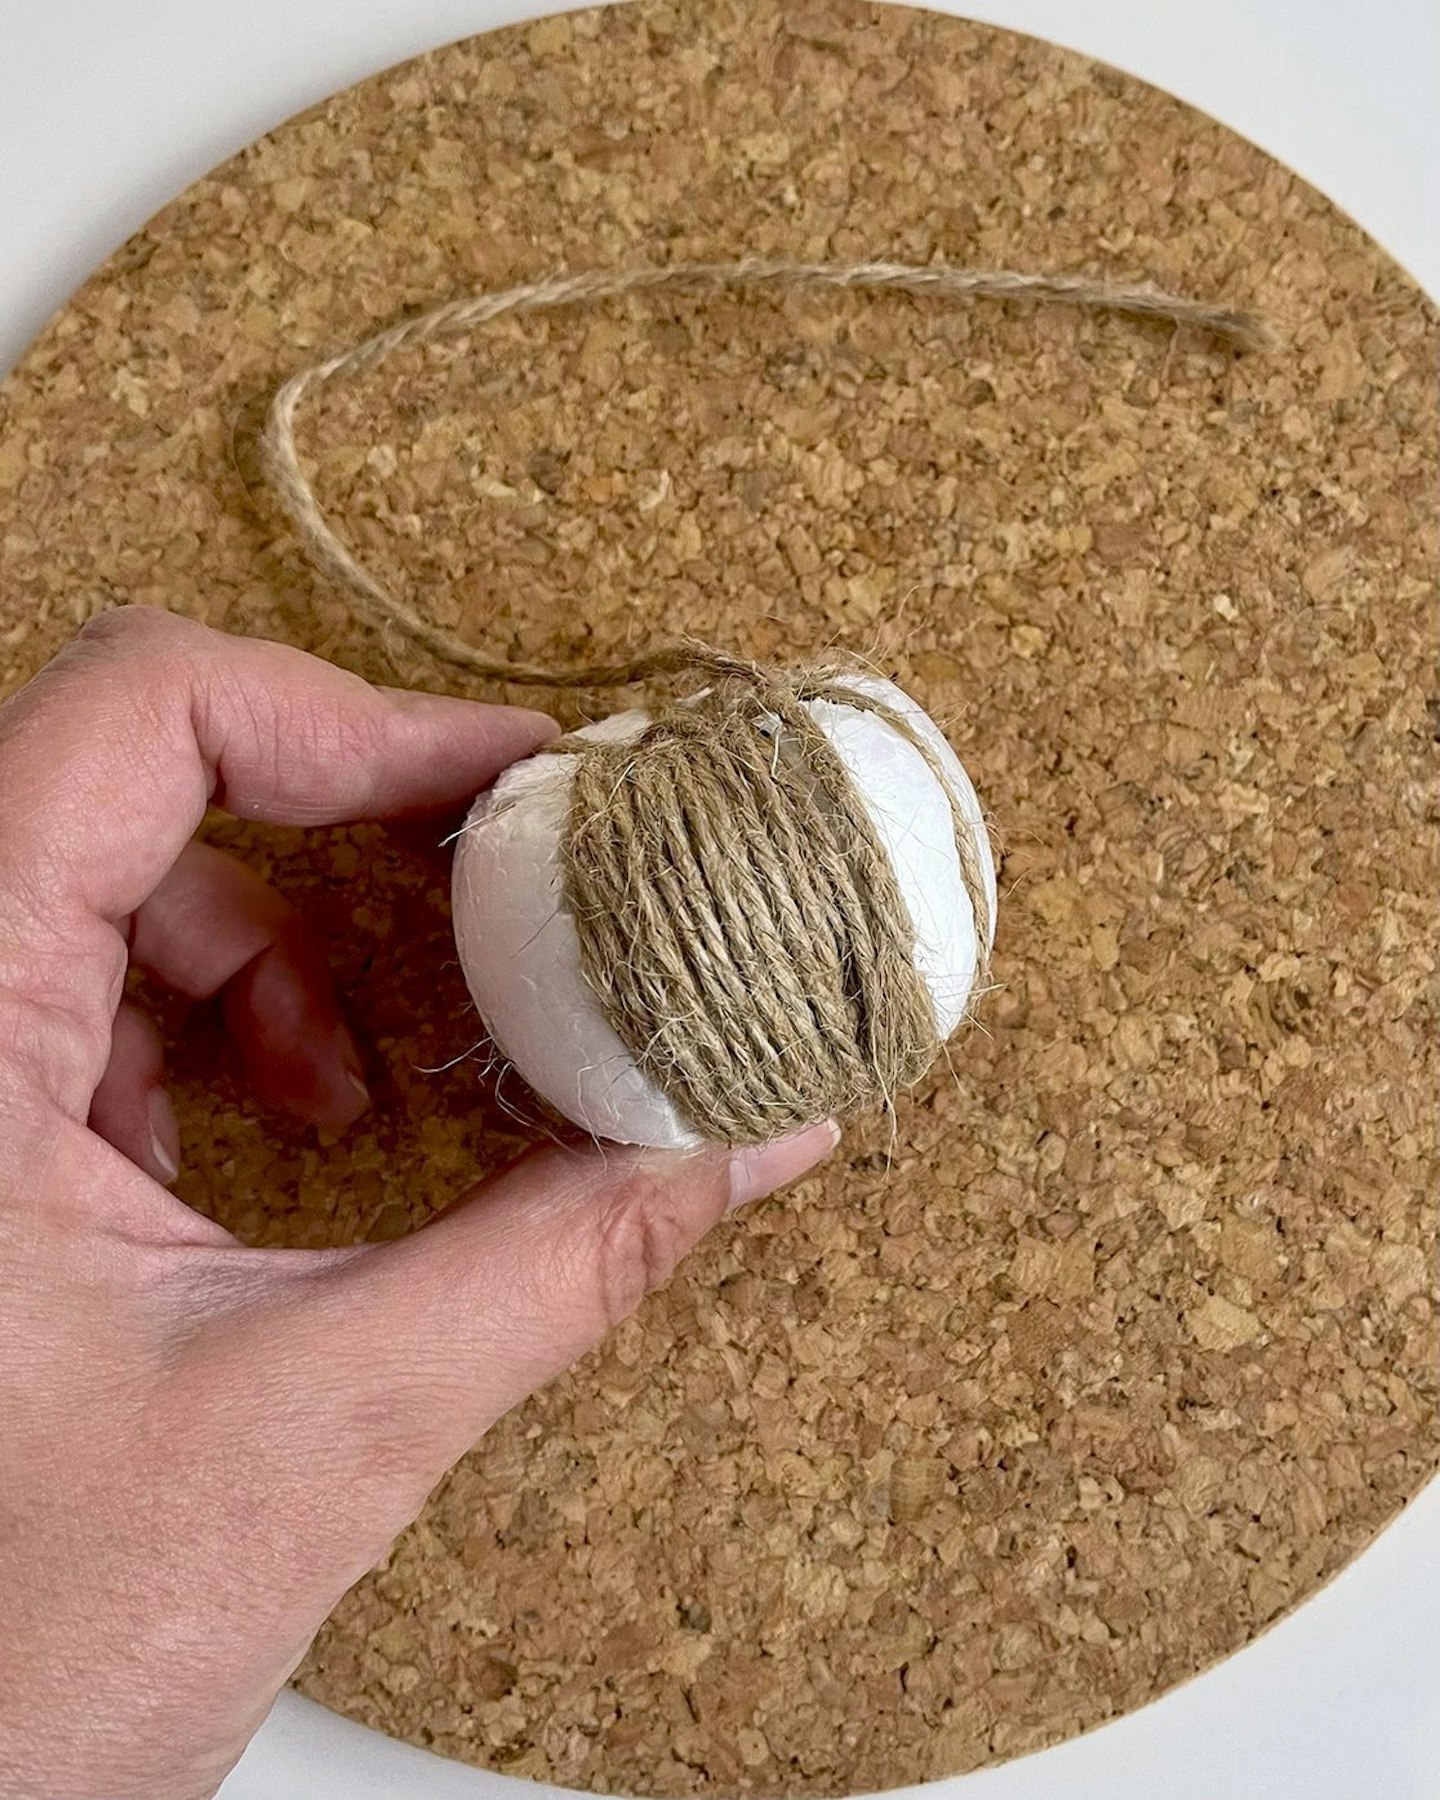
5 If you reach the end of your length of twine, just tie another piece on and continue, and try to hide any knots inside the pumpkin.
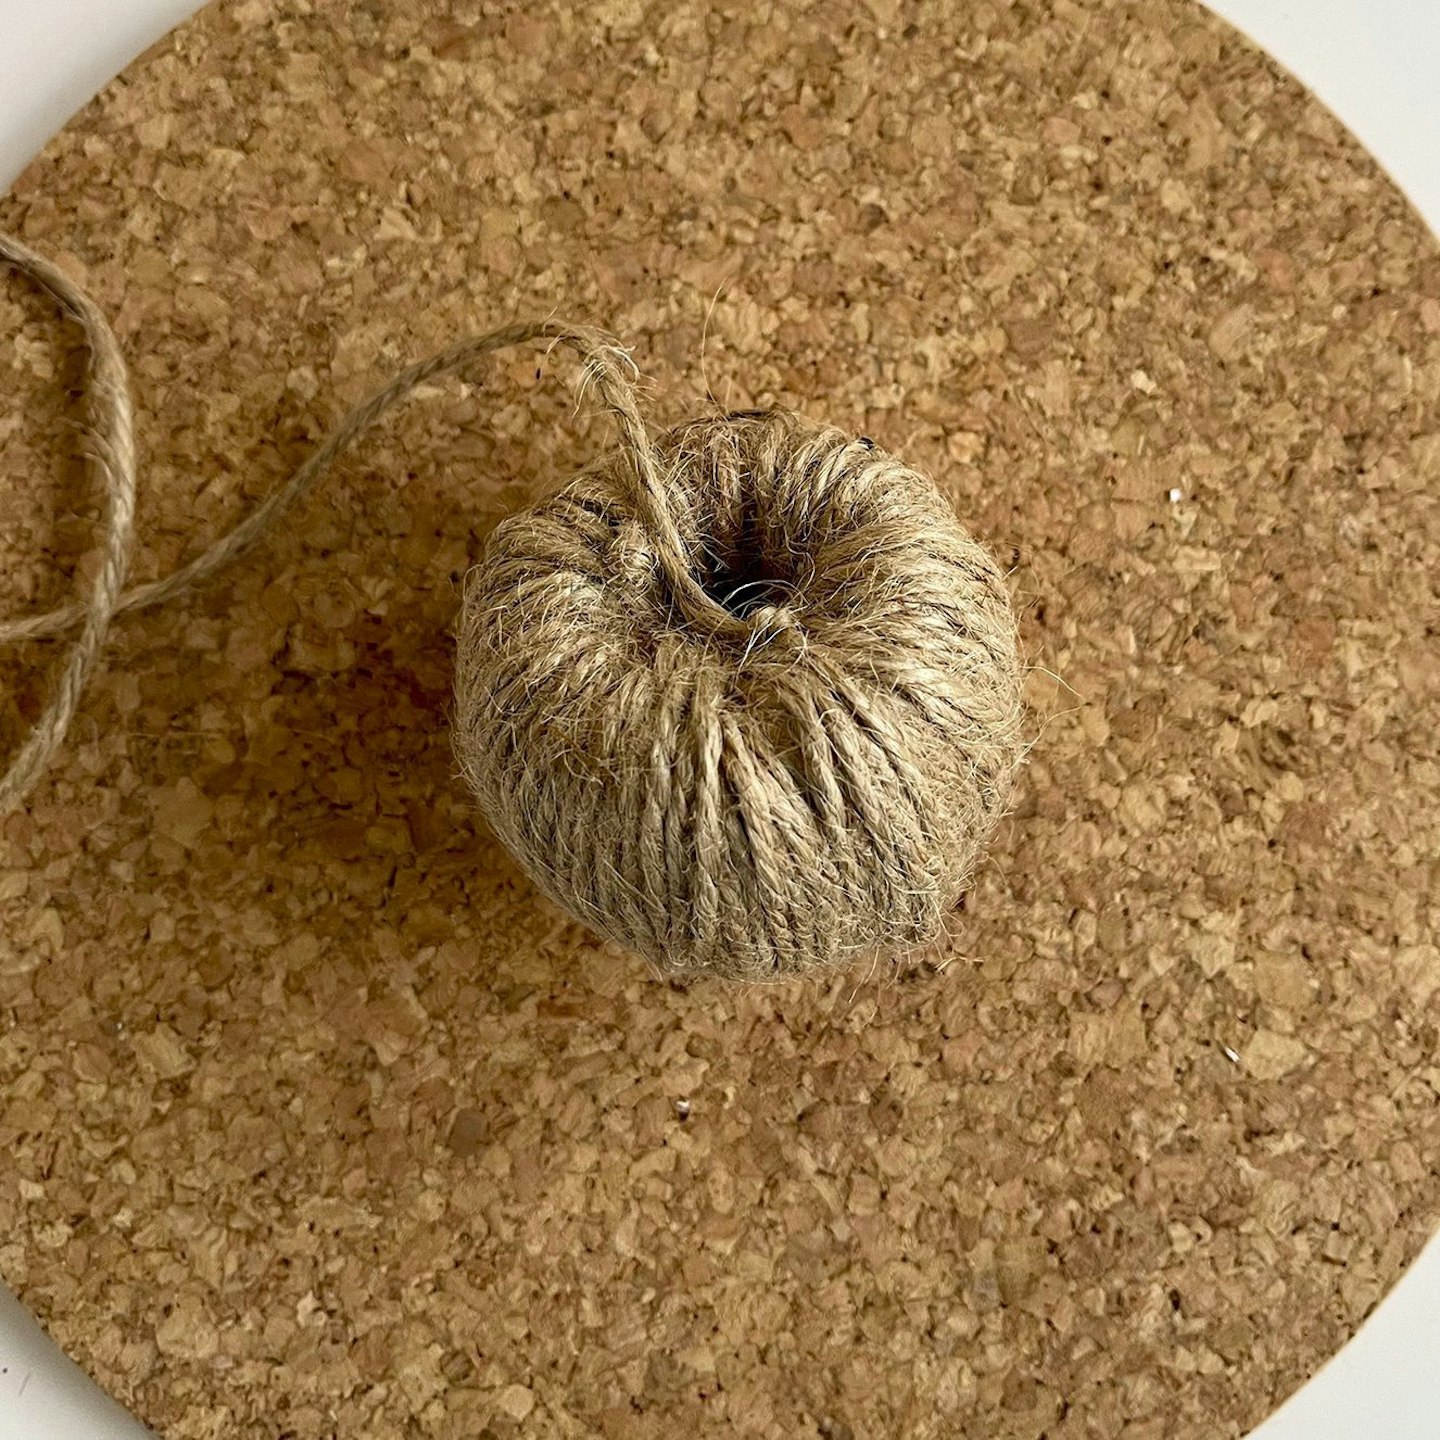
6 Once you have covered your pumpkin, tie off and tuck the knot into the centre to hide it.
7 If you find that there is still a hole in the centre, use some scrap fabric and your glue gun to fill it.
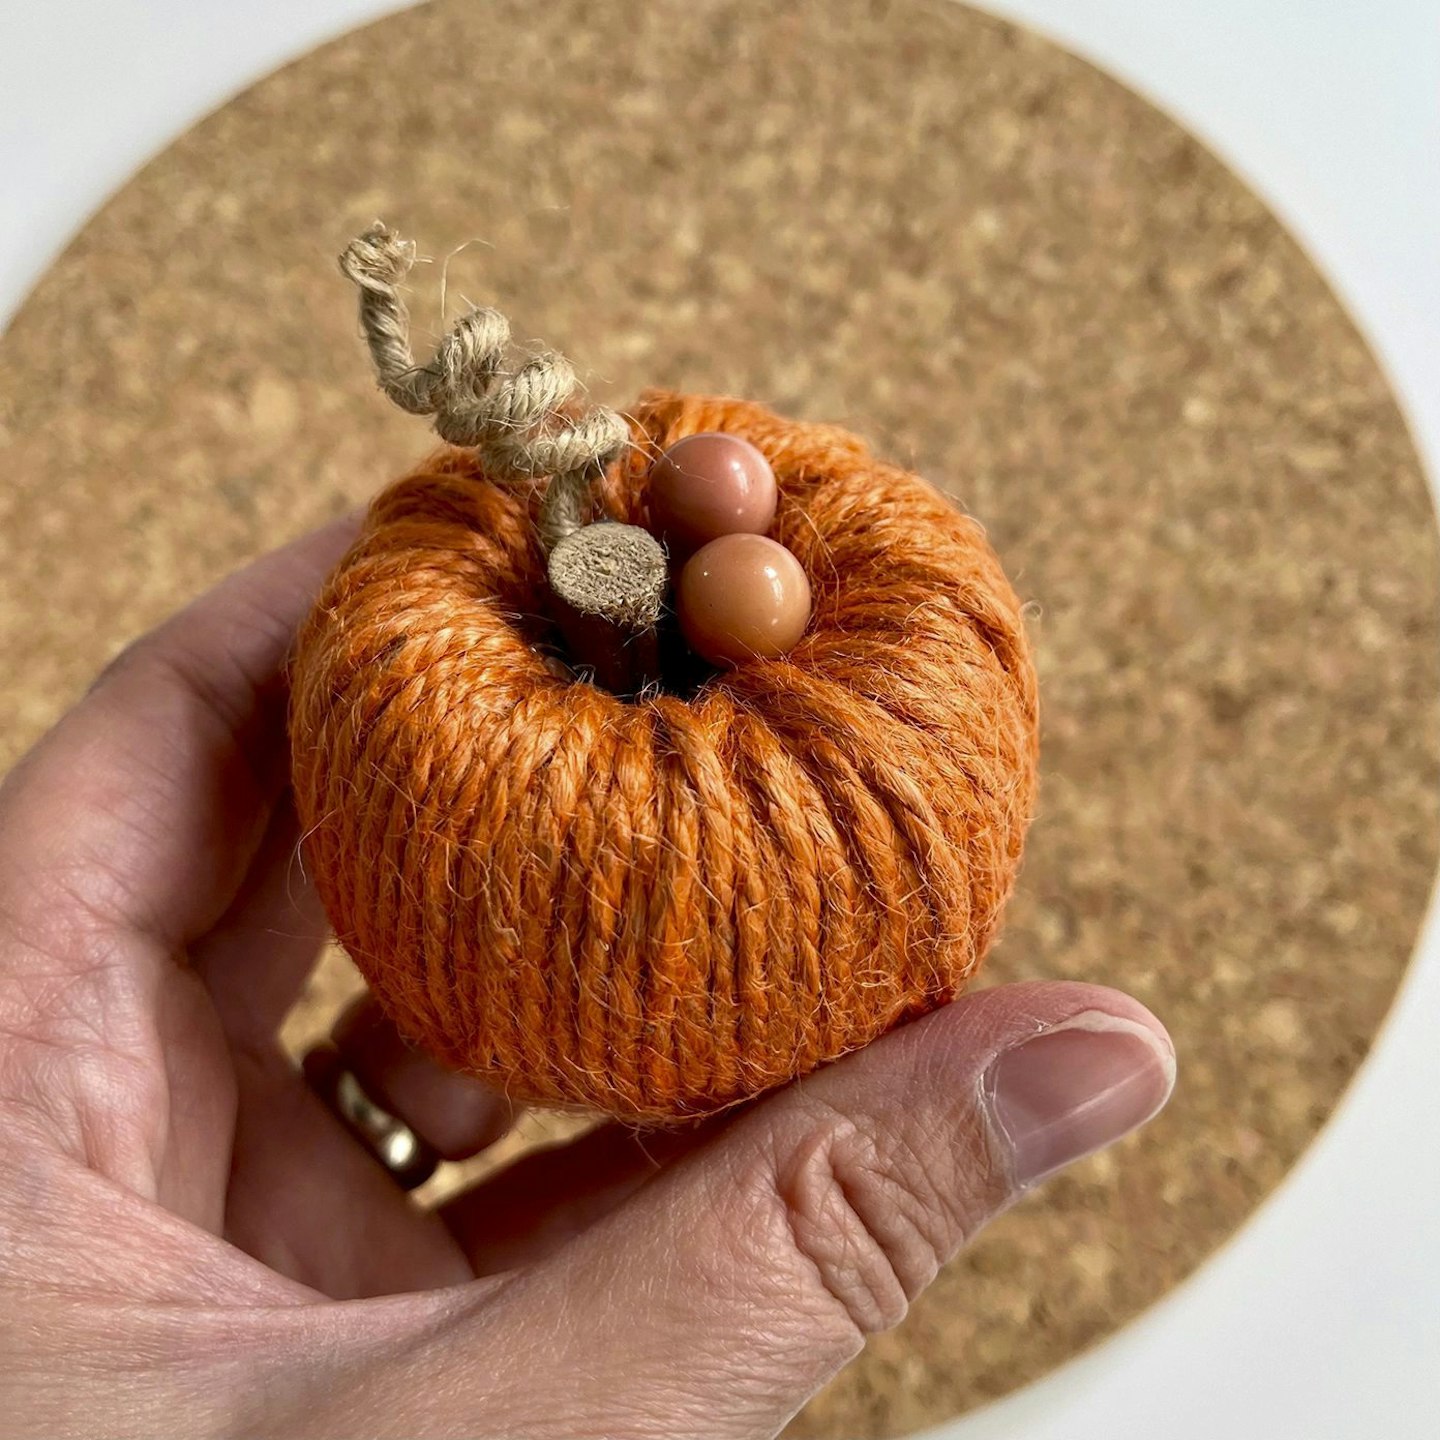
8 Finally, add a stem to the top by gluing a small piece of wooden stick or twig into the the top of the centre, then decorate it with some autumnal embellishments.
TOP TIP: Instead of using sticks or twigs, you could use cinnamon sticks or a rolled piece of thick ribbon to create the stem.