It’s fun to decorate your home for Halloween – the spookiest time of the year. But instead of splashing out on shop-bought decorations, why not try some easy Halloween crafts to create your own?
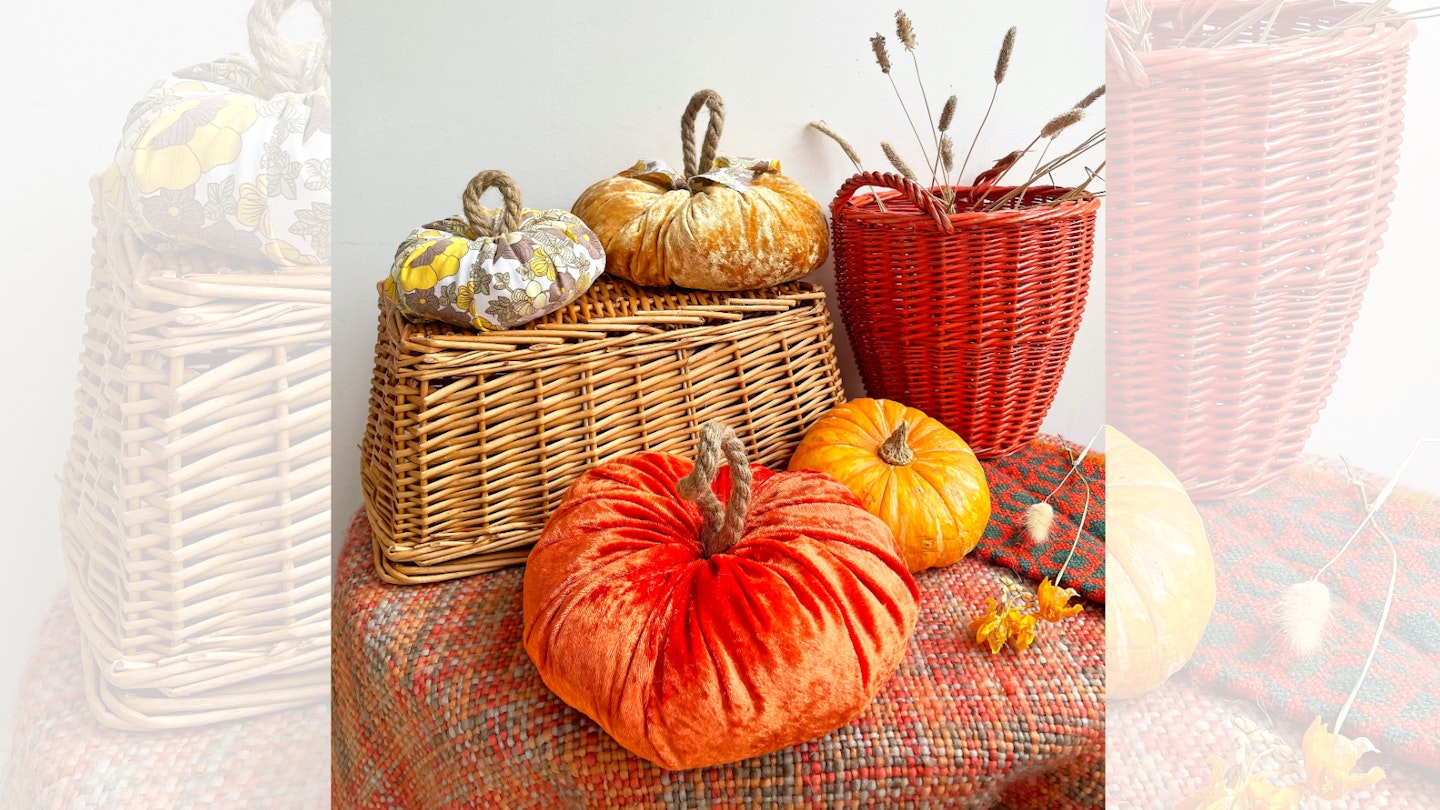
There are lots of great DIY Halloween crafts out there to try, like these super-simple but stylish craft pumpkins.
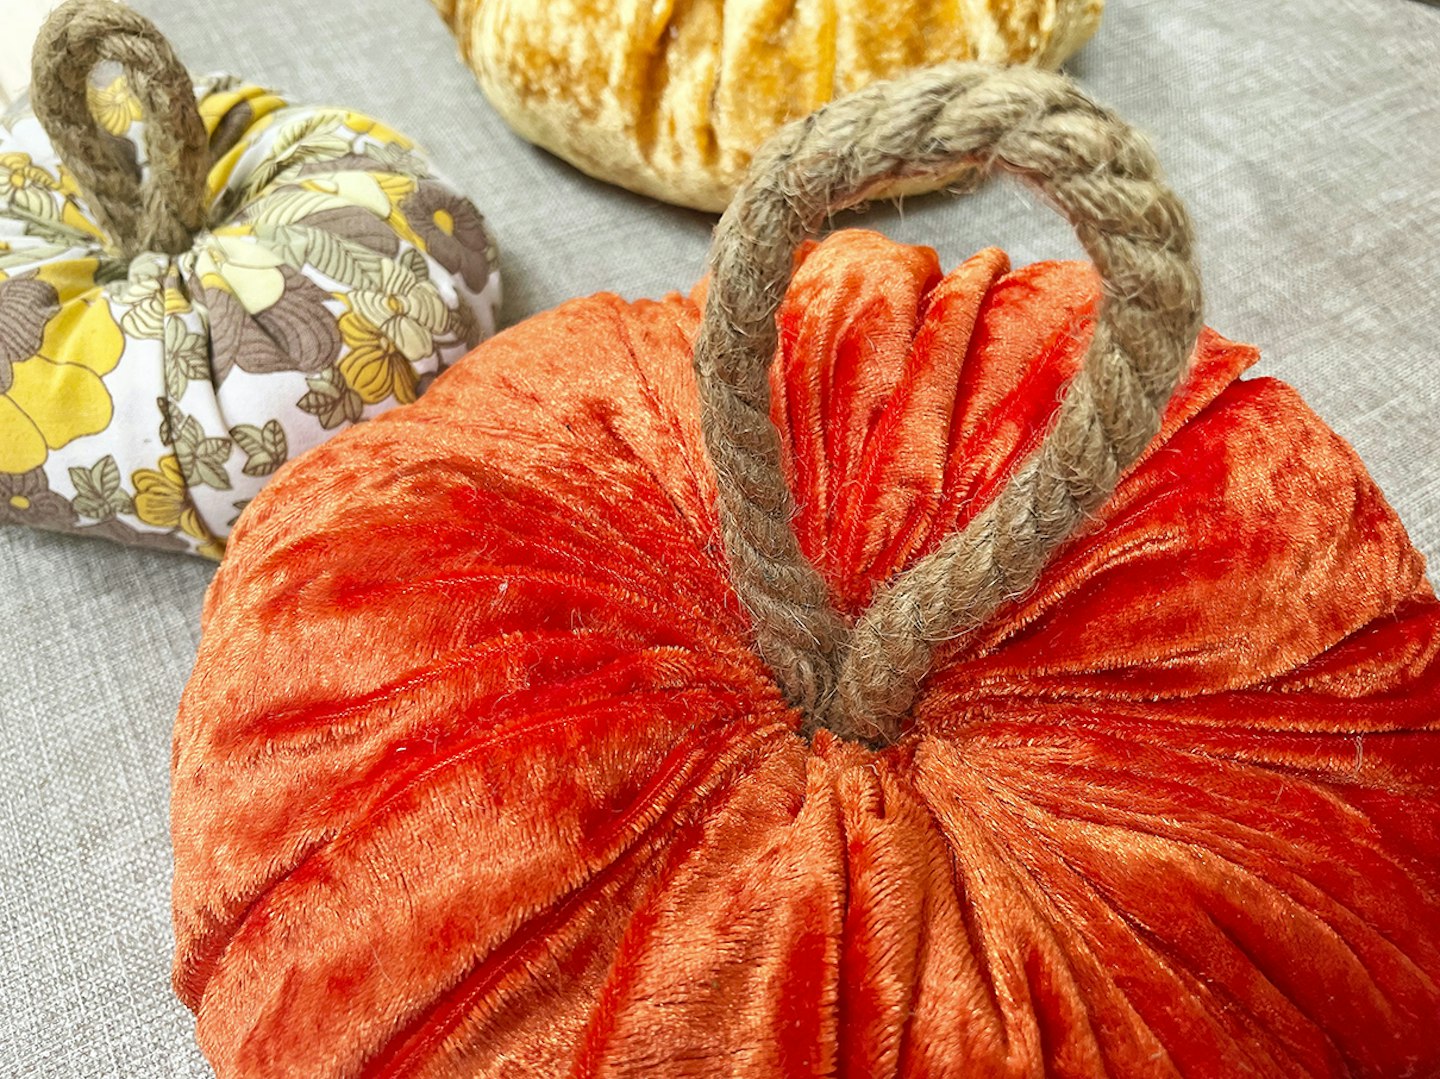
Created by maker Kate Beavis, these craft pumpkins are made from gathered velvet, with a contrasting fabric for the leaf and a piece of rope for the stalk.
No fancy sewing techniques are needed and you don’t need a sewing machine to try them. The only sewing required is a very simple running stitch which is used to gather the fabric together to create the pumpkin shape.
They really couldn’t be easier to make, and these plush craft pumpkins will look brilliant scattered around your home. So have an arts and crafts Halloween and have a go at making them.
Here’s our simple, step-by-step guide to making these gorgeous craft pumpkins…
What you will need:
-
50cm square pieces of velvet (could be smaller or larger of course!)
-
Contrasting material for leaves - approx. 30 cm x 10 cm to make 4 leaves
-
Rope - approx. 15 cm long
-
Soft toy stuffing
-
Needle and cotton
-
Sharp fabric scissors
-
Ruler
-
String
-
2 pens
-
Pinking shears
-
A scrap piece of paper
How to make
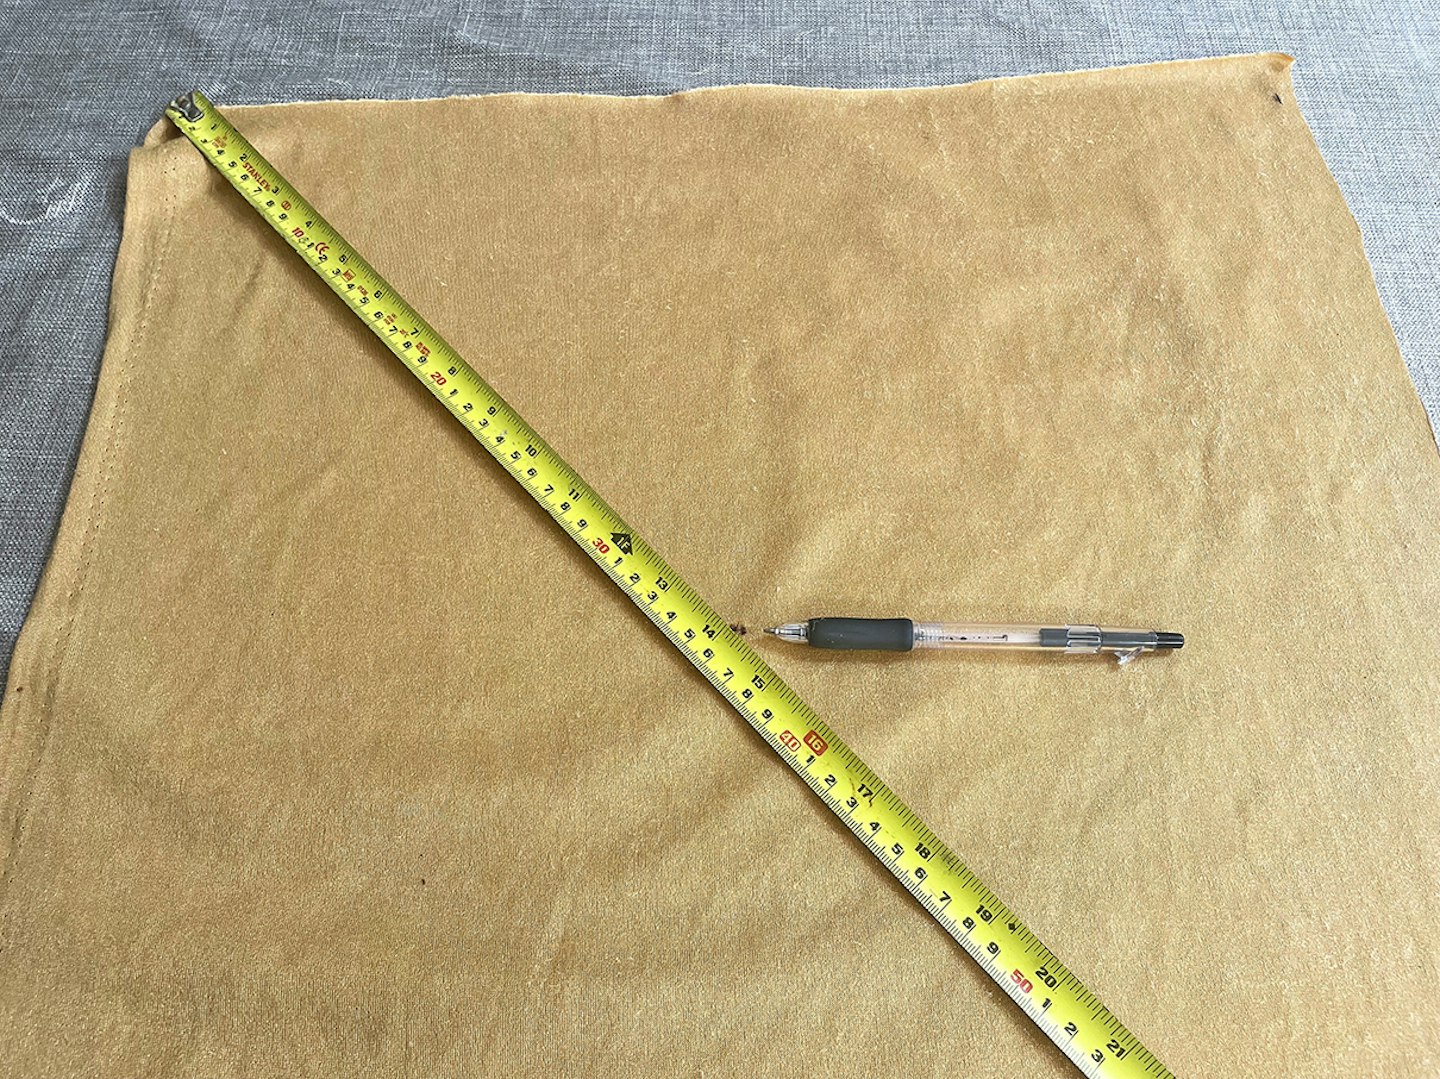
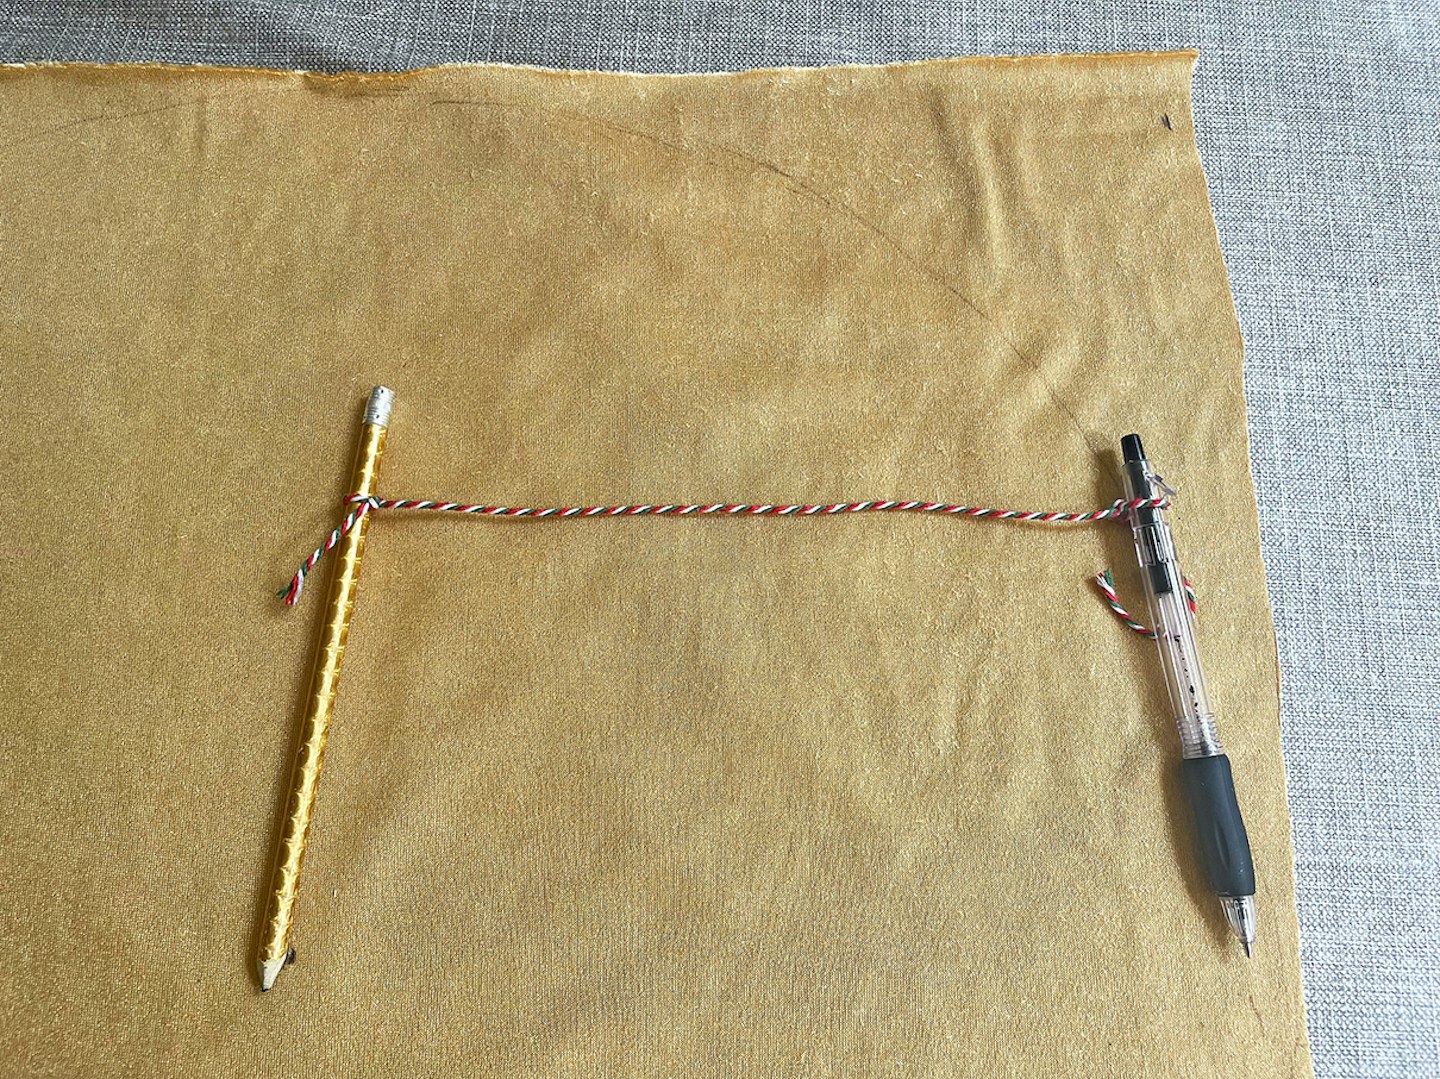
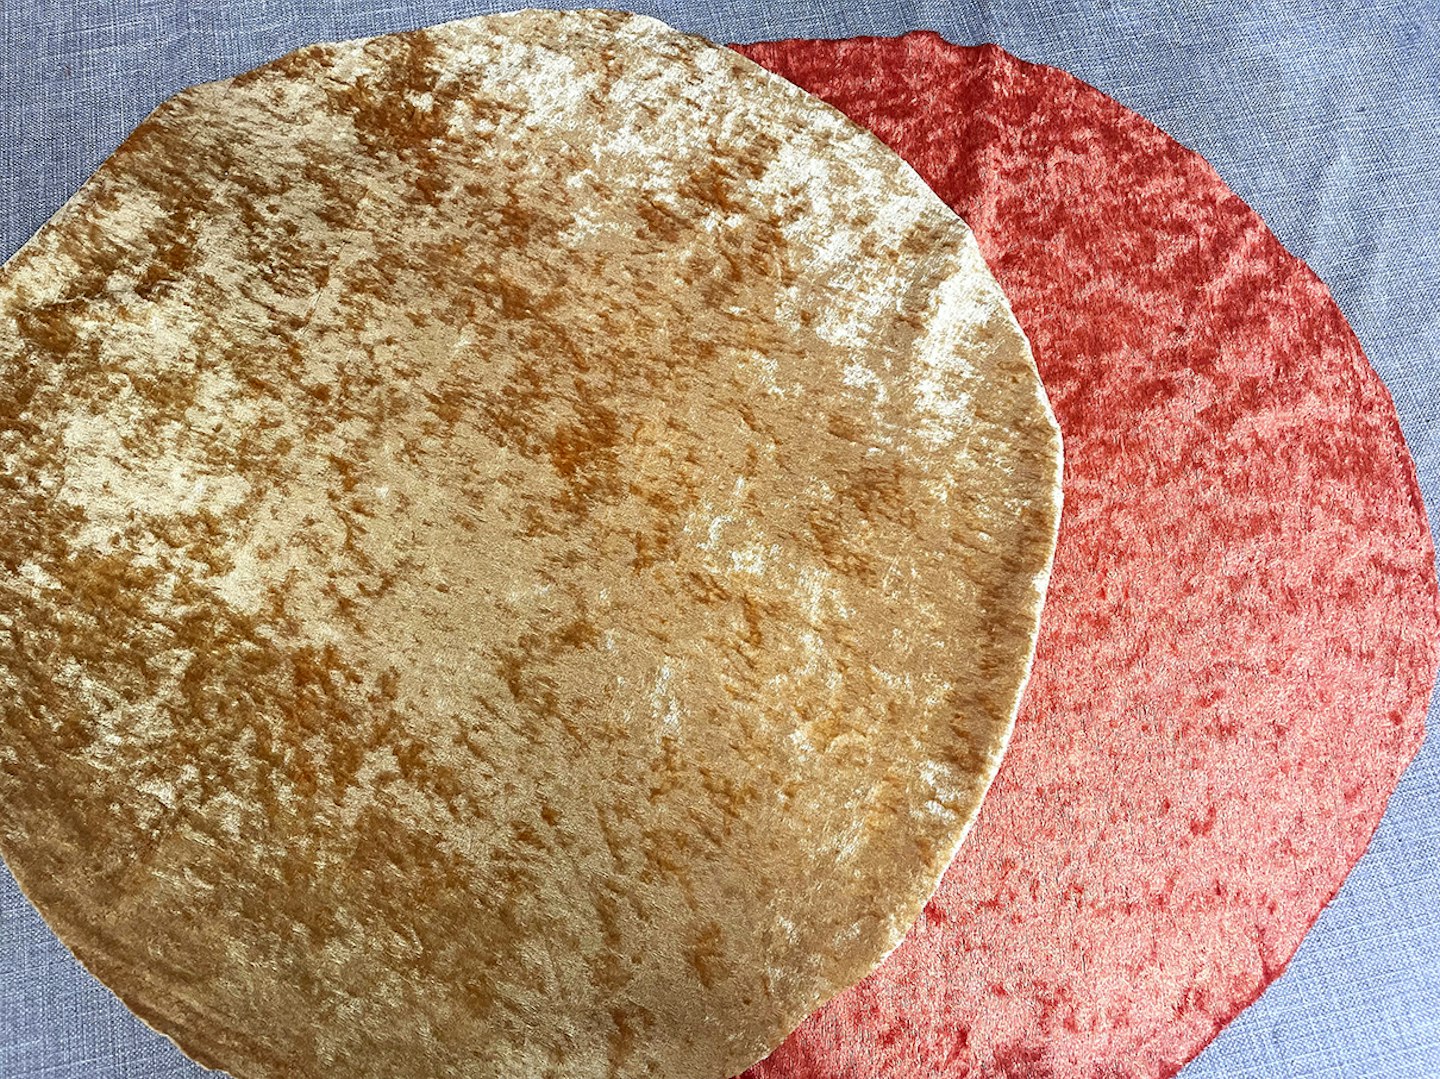
1 Cut the fabric into a square shape. Then using a ruler, mark the central point on the back of the fabric. Now you need to draw a circle. You can create a compass by tying a piece of string around two pens, keep one on the central point and move the other around the fabric to mark out a perfect circle. Repeat on each piece of fabric.
2 Cut this out using fabric scissors. Using double cotton threaded through the needle. Create a running stitch all around the circle, 1cm from the edge, weaving the cotton in and out. Make sure to leave a long piece of thread hanging at the start on the outside of the velvet as you will need this to pull the stitching tight later.
3 When you have finished the stitching, gently pull the cotton together to form a tight gathering. Do not pull it together fully. Stuff the pocket full of soft toy filling.
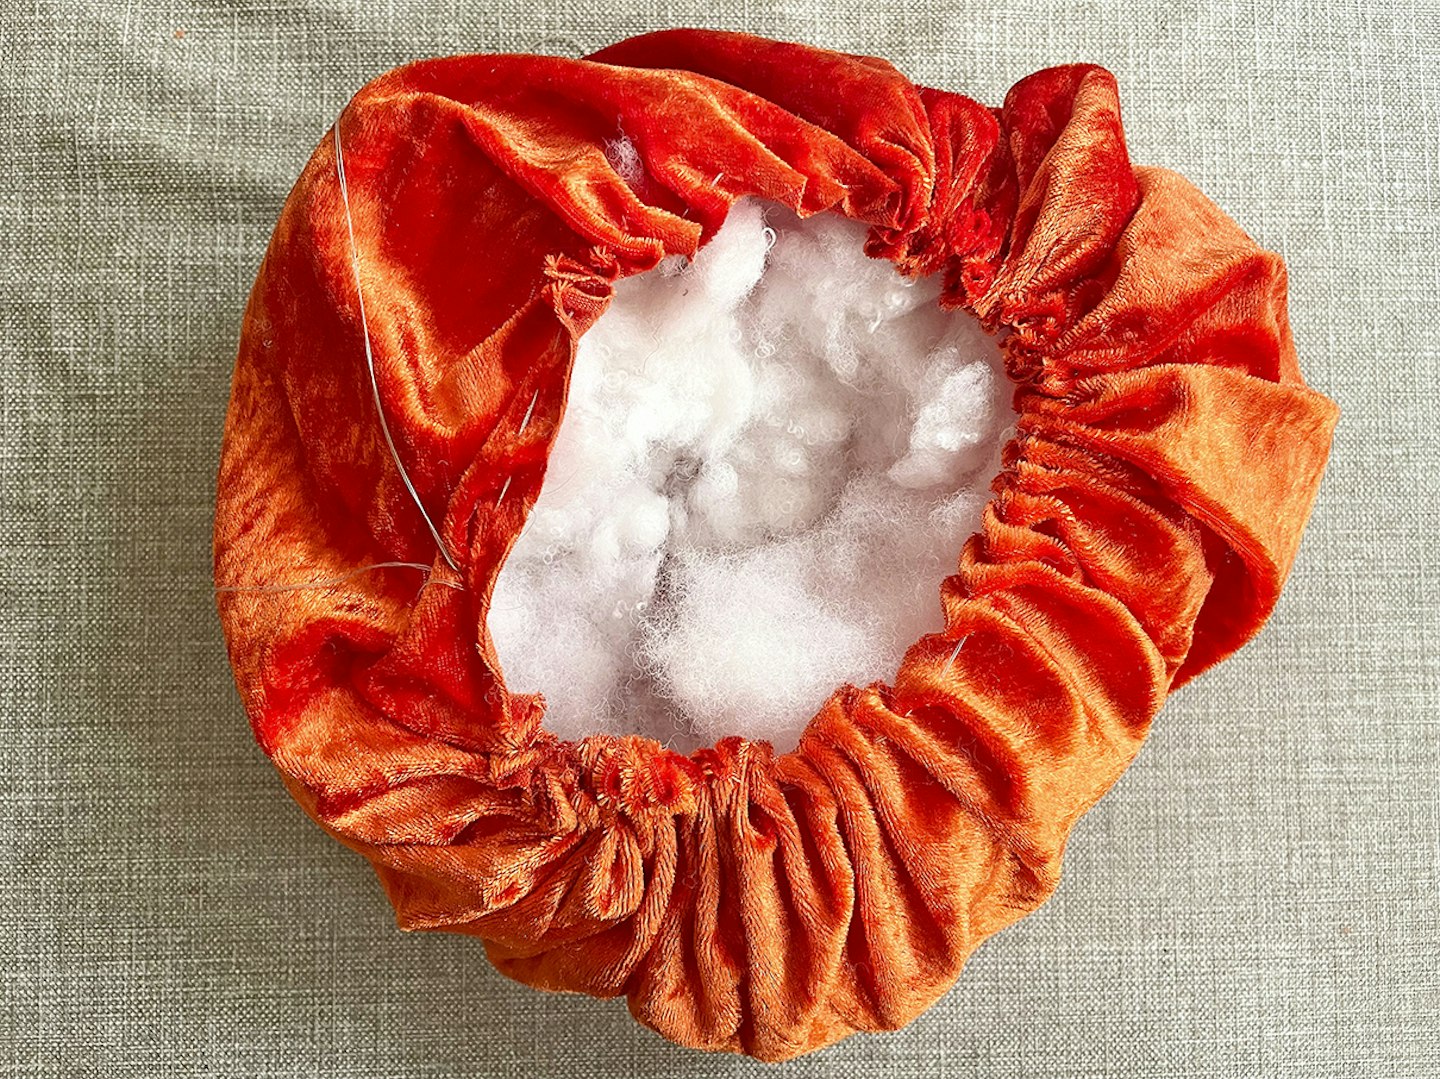
4 When it is full, gently pull both ends of cotton tightly to close the pumpkin. Don’t worry if there is a small hole left as this is perfect to push the stalk rope into later. When complete, tie a knot in both ends of the cotton.
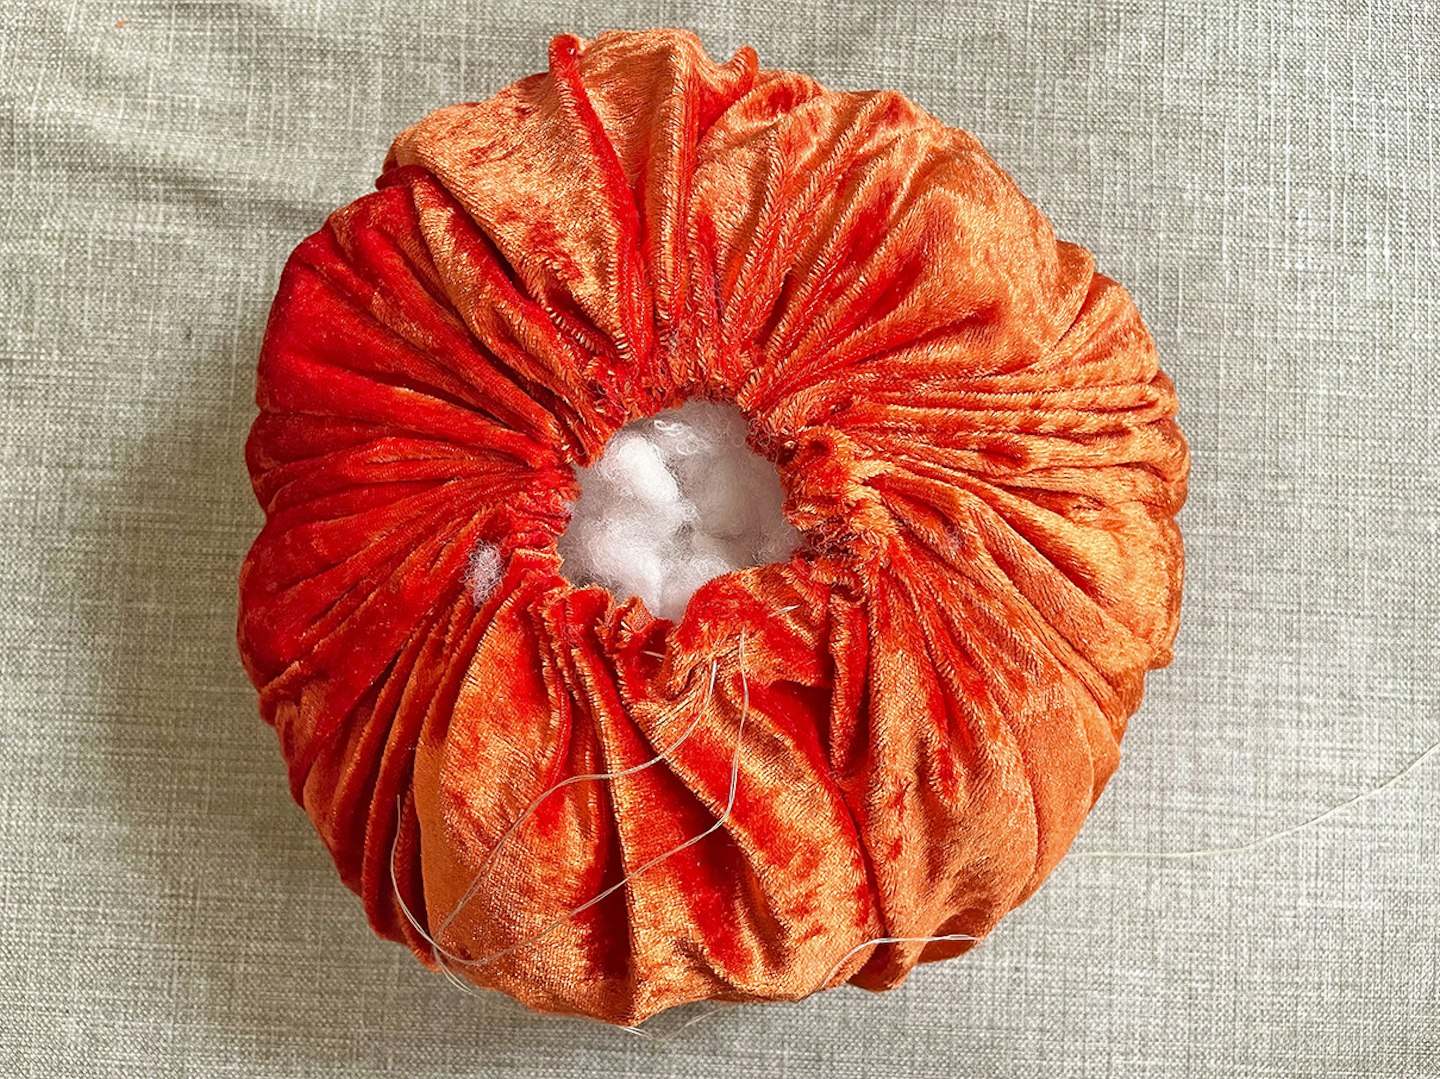
5 If you have cotton left, do not unthread your needle. If you don’t have any length of cotton left, cut more and thread through the needle. To create a better pumpkin shape, add a few stitches from top to bottom at the central point. You will need to push the pumpkin tightly to be able to do this.
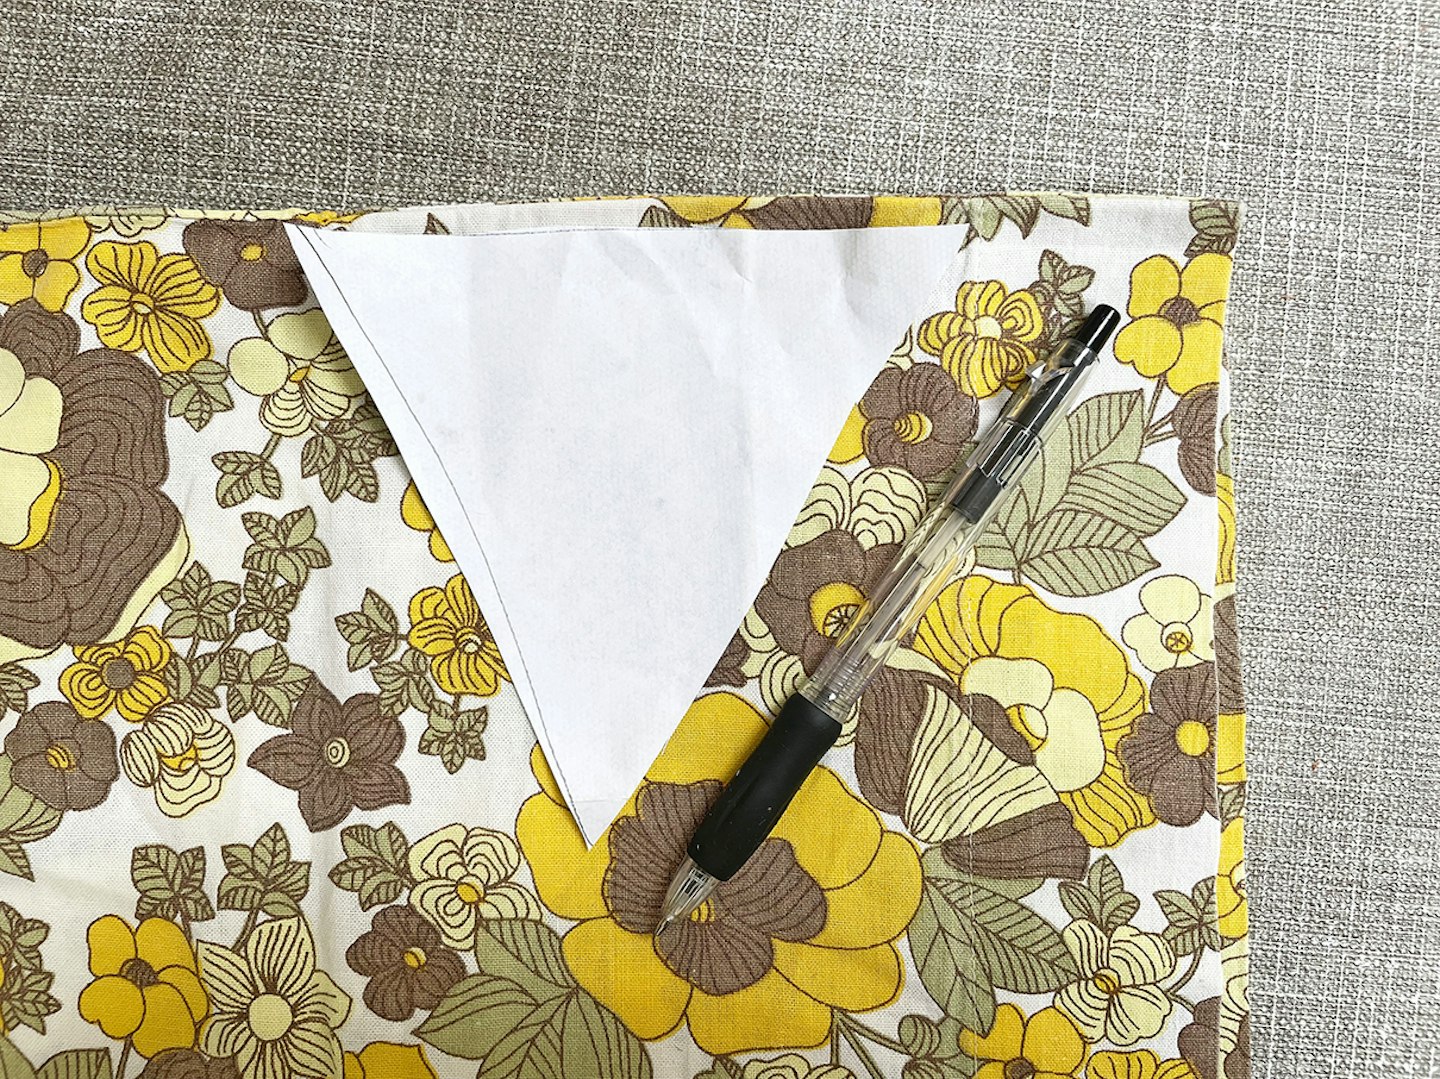
6 Cut out on a piece of paper a triangle shape to form a template for the leaves. Using pinking shears, cut out triangle shapes using the template in contrasting fabric.
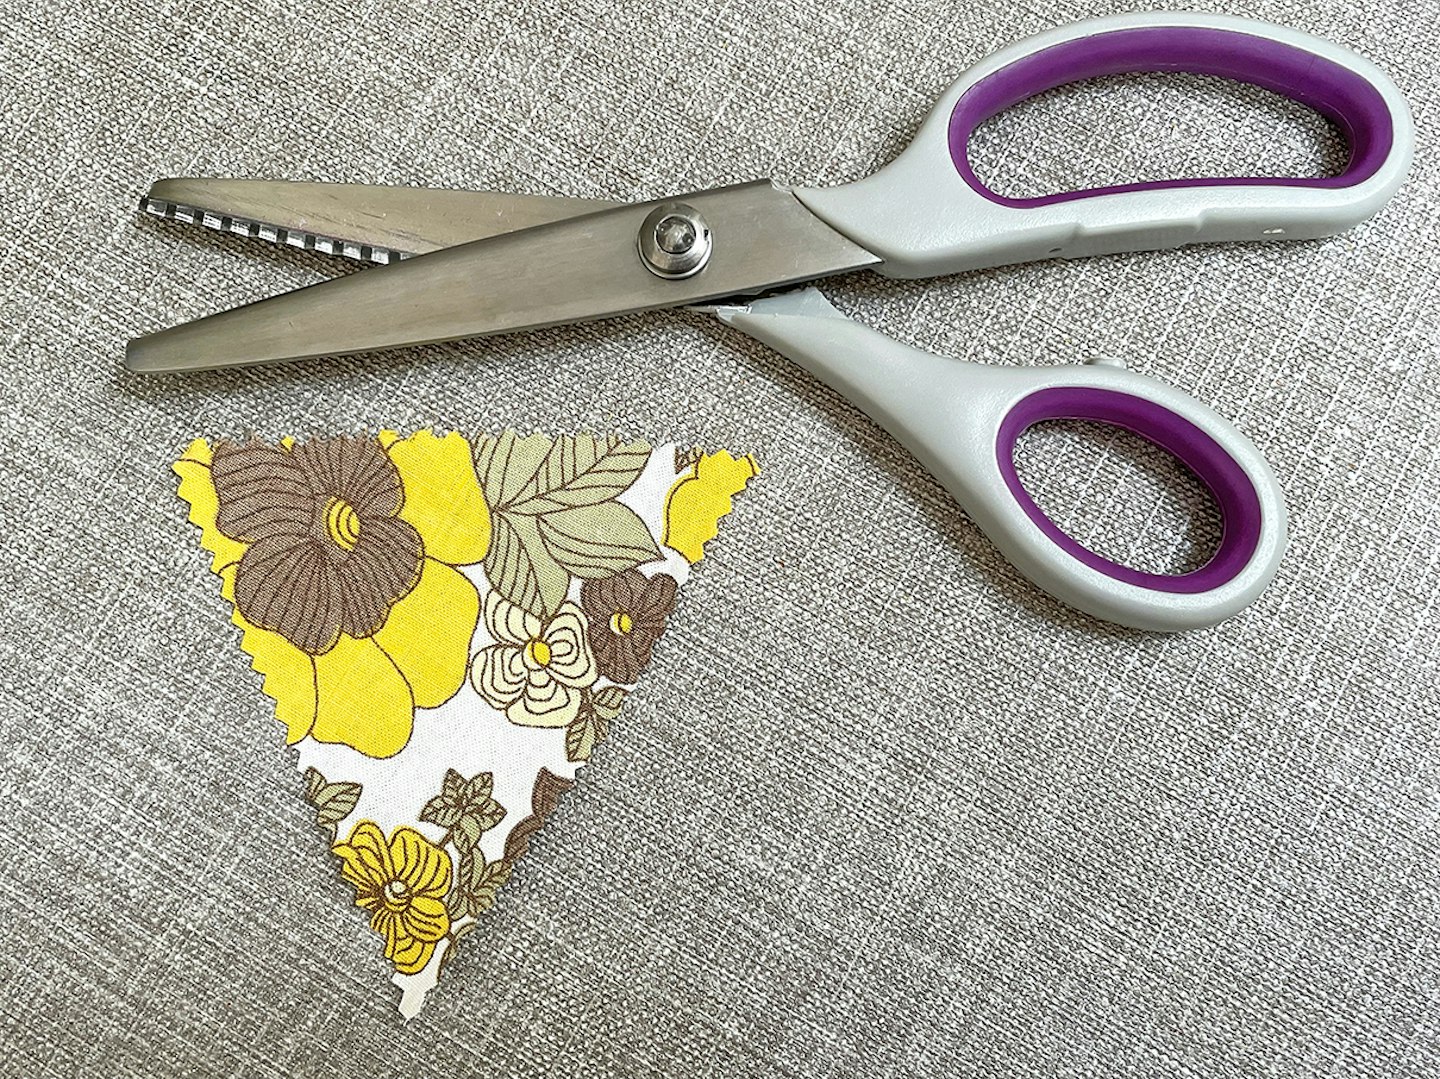
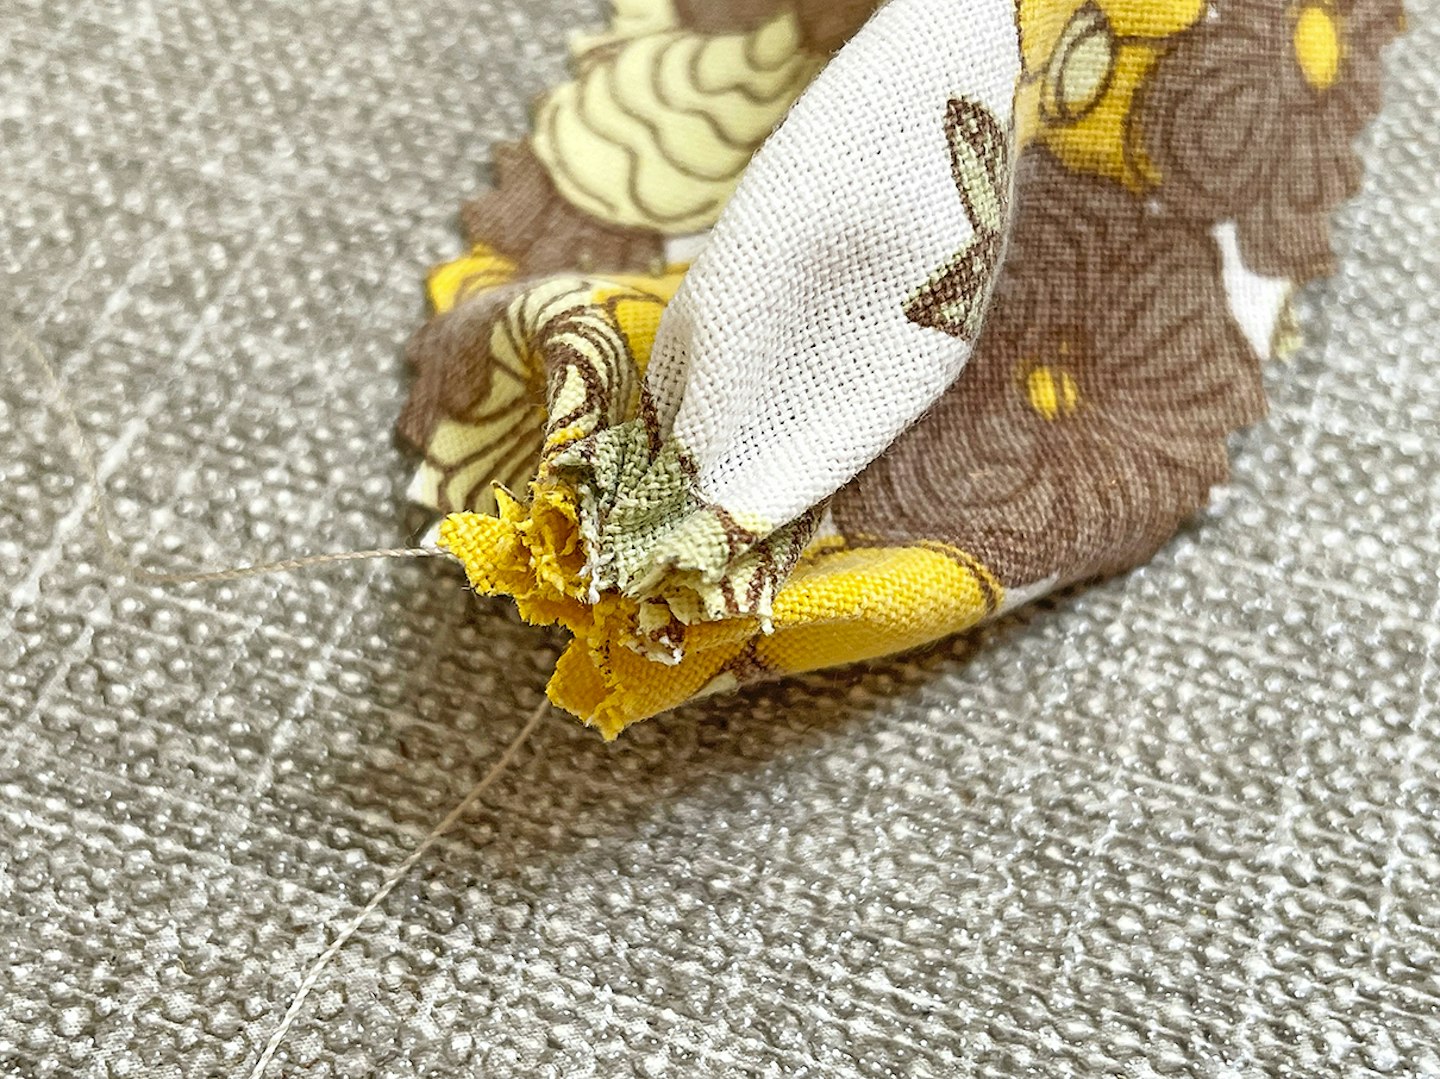
7 Stitch a row of running stitches along the top edge of the triangle and pull both ends together to form a gathered edge. Stitch these ends onto the pumpkin.

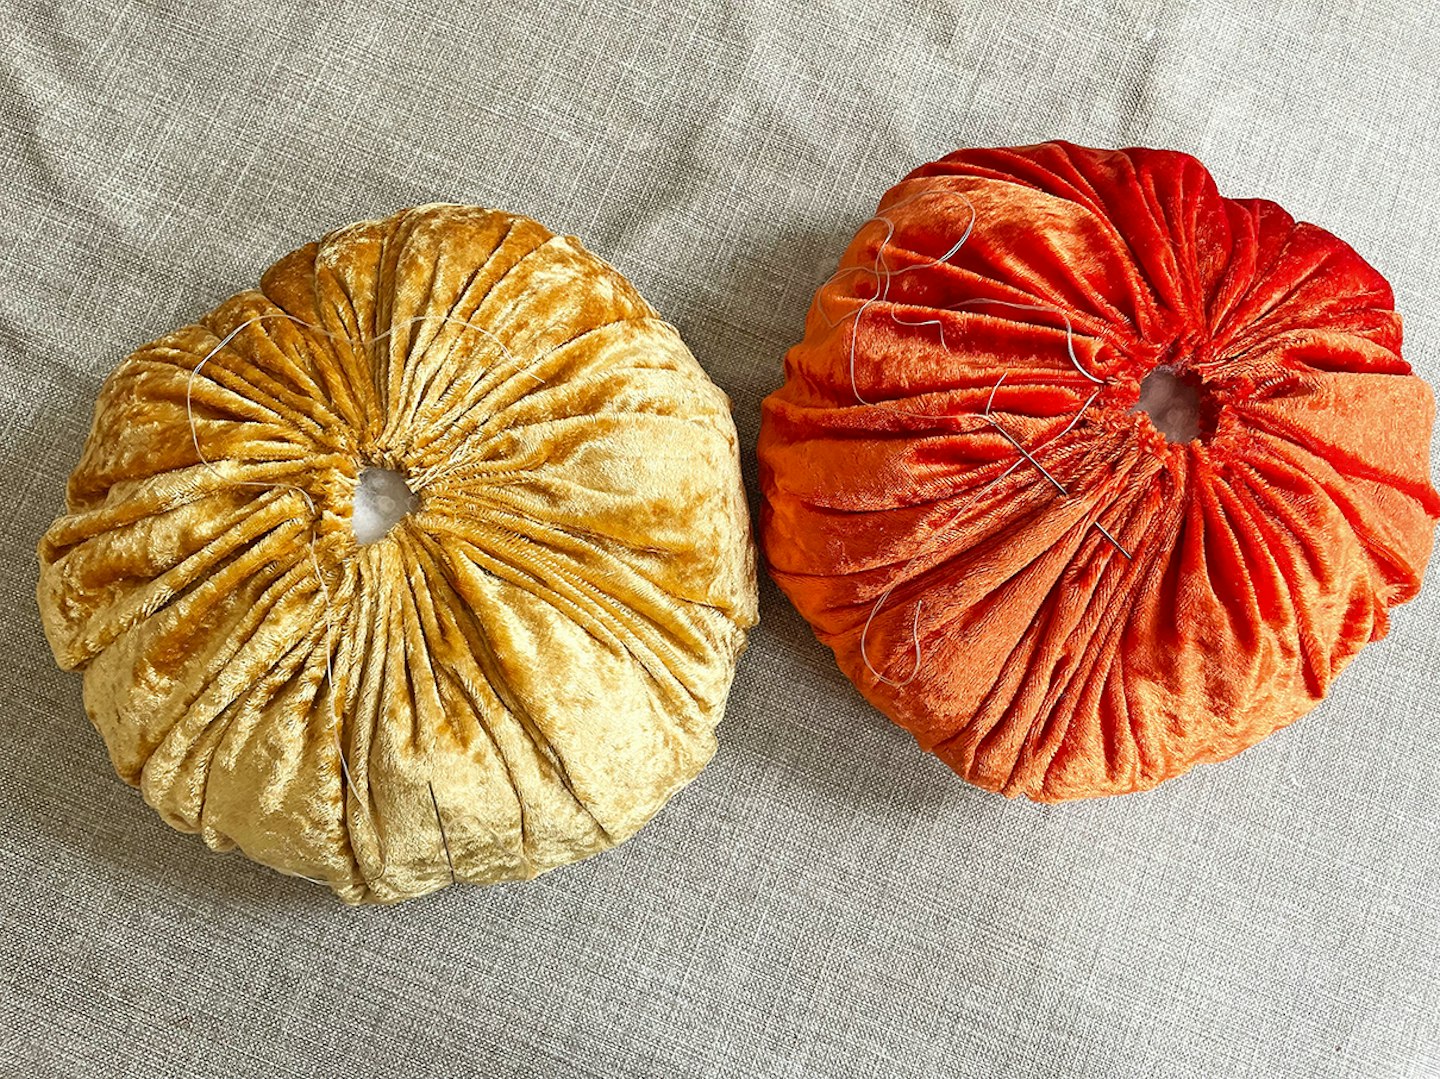
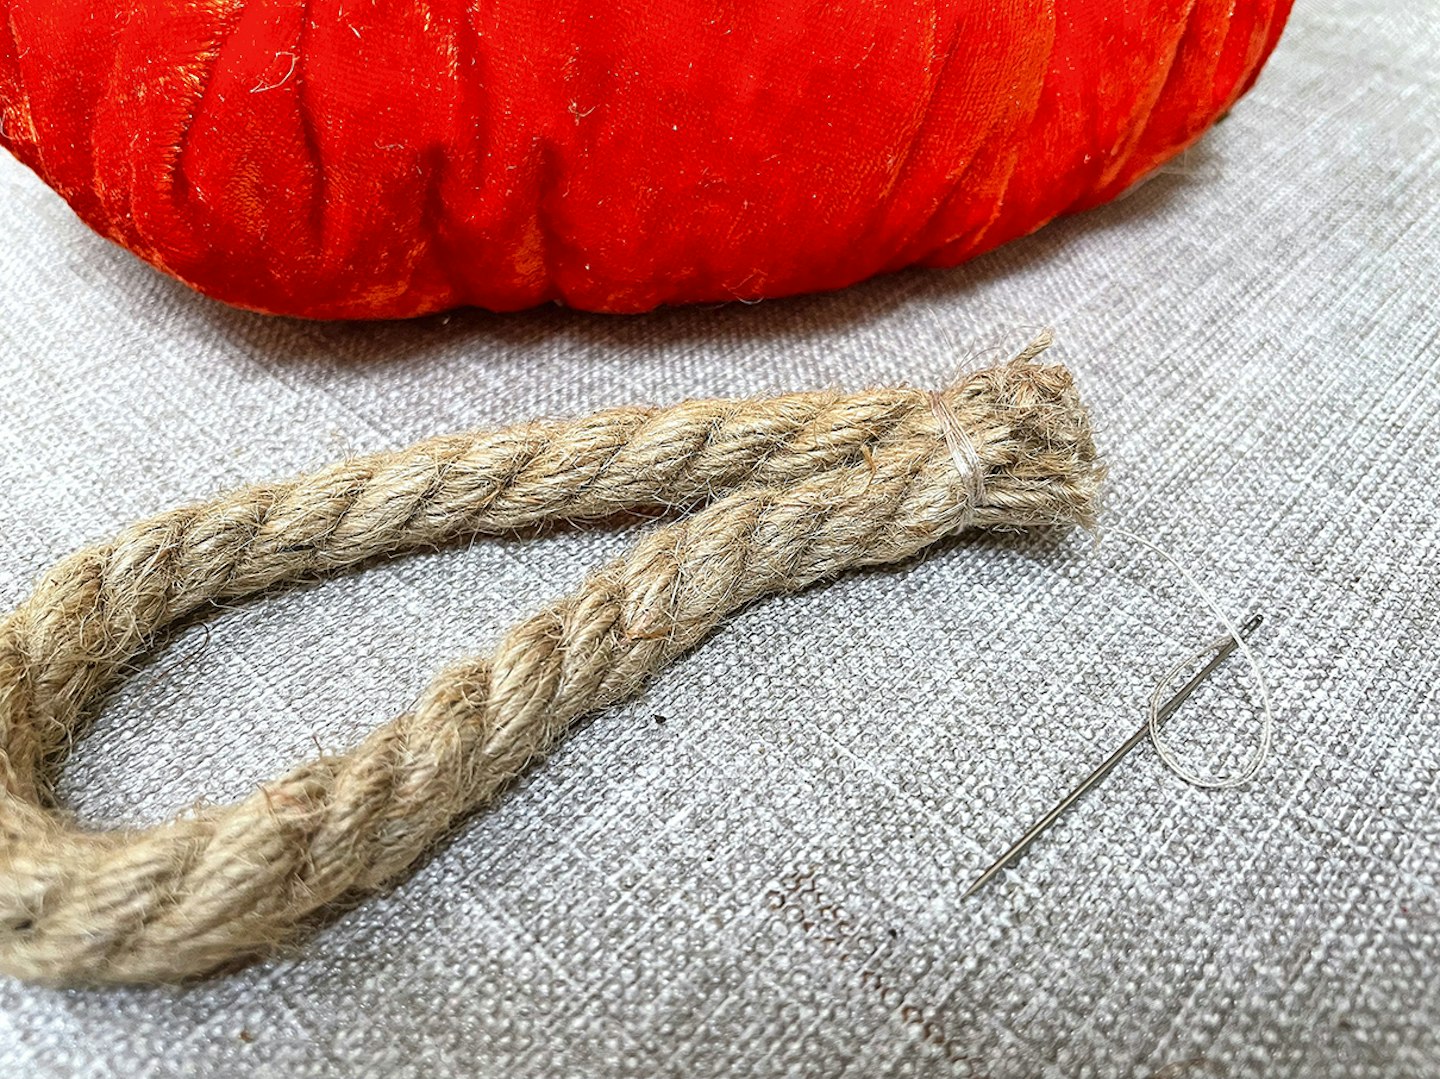
8 To make the stalks, cut lengths of rope, approx. 15 cm long. Tie both ends together and stitch into place. These can then be moulded into shapes, twisted or left as a loop. Gently squash the pumpkins to make your desired shape. You can try out different fabrics to make a display.
TOP TIP: At Halloween time, save and dry real pumpkin stalks to add later or to new ones that you make.